Airport Security Hacks That Save Time
Getting through airport security quickly is a skill, and the travelers who move through like they own the place all follow the same simple rules. The fastest person through security is always the one who packed and dressed with security in mind before they ever left the house. This article builds that skill from the ground up.
Grab Our Travel Packing Checklist
Our free packing checklist includes the security preparation category — liquids confirmed at the top, laptop in the accessible sleeve, shoes confirmed slip-on or easy-removal, pockets noted as items-to-clear — so the security-ready system is confirmed at the packing stage rather than assembled at the security tray. Print it before your next flight.
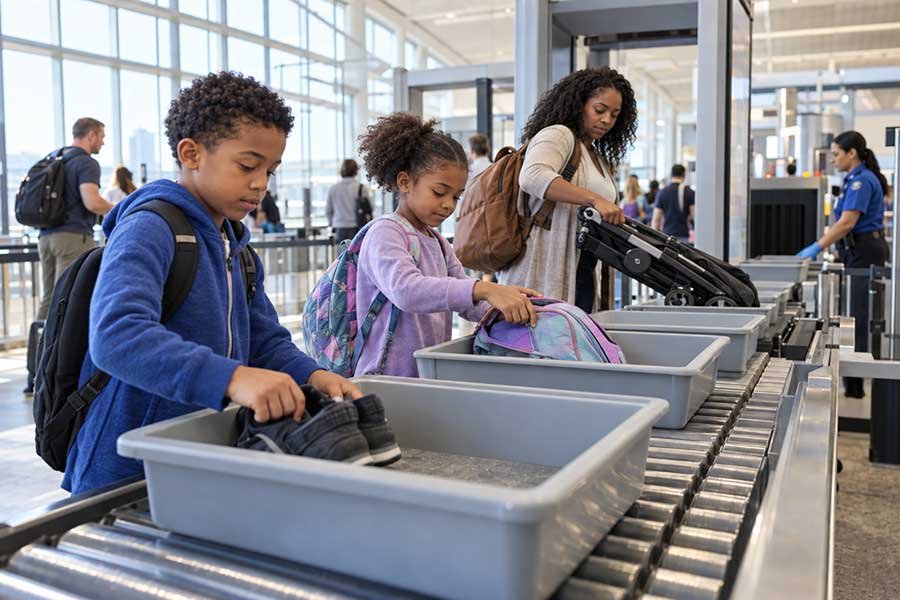
Get the Free ChecklistIn the United States and many other countries, standard security screening requires shoes to be removed and placed in the tray before the scanner. The traveler wearing lace-up boots or tied athletic shoes at the standard security checkpoint is the traveler performing a thirty-to-sixty-second shoe removal and re-tying at the collection end of the belt, with their tray blocked behind them, their carry-on waiting to be retrieved, and the queue behind them absorbing the delay. The traveler in slip-on shoes has their shoes in the tray in three seconds and back on their feet in three seconds at the other end. The total shoe management time at security in slip-on shoes is under ten seconds. In lace-up shoes it is forty-five seconds at best and a minute and a half when the laces need re-tying at a bench because the tray area is not a safe place to crouch.
The slip-on shoe for travel day does not need to be a casual shoe. A quality leather loafer, a leather mule, a Chelsea boot, or a refined sneaker with an elastic or slip-on entry — all of these read as intentional travel day shoes and all manage the security checkpoint in under ten seconds. The aesthetic criterion for the travel day shoe is compatible with the slip-on criterion: the shoe that looks good at the destination’s first impression and removes at the security checkpoint without lace management is the shoe that handles both requirements without compromise.
For travelers whose trip requires lace-up shoes at the destination — the hiking boots for the first-day trail, the dress shoes for the first-night event — pack those shoes rather than wearing them on the travel day. Wear the slip-on for the journey and change into the destination shoe on arrival. The hiking boot in the bag incurs no security delay. The hiking boot on the foot at the security checkpoint incurs the specific thirty-second delay per person that produces the two-minute queue backup when the traveler ahead performs it and the understanding nod from the experienced travelers in line who know exactly what caused the pause.
The fastest person through security is always the one who packed and dressed with security in mind before they ever left the house.
Getting through airport security quickly is a skill. The travelers who move through like they own the place all follow the same simple rules — and none of the rules are complicated.
Wear compression or no-show socks under the slip-on shoes specifically for the travel day. The security checkpoint floor at any major airport is one of the highest-traffic surfaces in any public environment and is walked barefoot or in socks by thousands of travelers daily regardless of cleaning schedules. The sock is the barrier between the security floor and the foot. The no-show sock that disappears under the slip-on shoe’s collar provides the barrier without producing the visible sock-with-loafer combination that some travel outfits would prefer to avoid. The thick compression sock under the Chelsea boot provides the barrier and the circulation benefit of compression for long-haul flights. Either way, the socks and the slip-on shoes together produce the fastest shoe management at security and the cleanest foot experience at the checkpoint floor.
Let Us Book the Trip That Makes Every Security Hack Worth Having
The security system works best on the trip worth getting to quickly. Tell us where you want to go. We will handle the booking, the flight research, and the itinerary. You handle the slip-on shoes.
Plan Our EscapeThe TSA liquids rule requires that all carry-on liquids, gels, aerosols, creams, and pastes be in containers of 3.4 ounces (100 milliliters) or less and placed in a single clear quart-sized bag that is removed from the carry-on and placed in the tray separately for X-ray screening. This rule is applied consistently at all US airports and at most international security checkpoints that use the same standard. The traveler who knows the rule and has the clear bag ready at the top of the carry-on removes it in three seconds, places it in the tray, and moves through. The traveler who knows the rule but packed the clear bag somewhere in the middle of the carry-on spends thirty seconds excavating it while the queue watches. The traveler who did not know the rule discovers it at the checkpoint, produces the bag from wherever the liquids ended up, and may have the bag’s most over-limit container removed and discarded — a specific inconvenience that is entirely preventable by decanting every liquid into a 3.4-ounce container before departure.
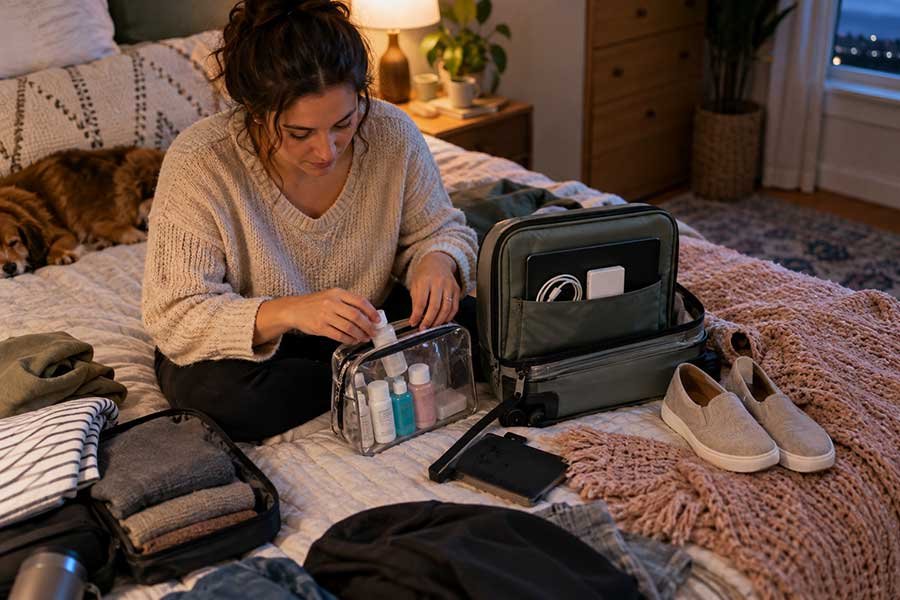
The clear bag at the top of the carry-on is a packing-session decision rather than a security checkpoint decision. Pack the toiletry category in a transparent bag or place the clear liquids bag on top of everything else in the carry-on as the last item packed, so it is the first item removed at the security tray without needing to open the bag any further. The carry-on that requires full excavation to retrieve the liquids bag is a carry-on that was packed without security in mind. The carry-on that produces the clear bag from the top exterior pocket in three seconds is the carry-on that was packed for the checkpoint as much as for the destination.
The 3.4-ounce (100-milliliter) rule applies to every liquid and semi-liquid, including items that travelers consistently discover are not exempt from it: peanut butter, jam, hummus, yogurt, and other food items with a gel or liquid consistency; mascara and lip gloss, which are cosmetically solid in appearance but gel or liquid in TSA classification; and the full-size shampoo that seemed like a good idea to pack directly rather than decanting. The rule applies at the checkpoint regardless of whether the traveler considers the item to be a liquid. When in doubt, decant into a 3.4-ounce container or place in the checked bag. The question of whether a specific item is classified as a liquid by the TSA is answered accurately by the TSA’s own guidelines on its official website, which should be consulted before any packing session that involves an unusual or borderline item.
Mark the clear liquids bag with a small luggage tag or a colored rubber band so it is visually identifiable among the tray’s other contents at the collection end of the belt. The security checkpoint’s collection area at a busy airport has multiple passengers’ trays arriving close together, and the unmarked clear bag from one tray is visually identical to the unmarked clear bag from the adjacent tray. The colored rubber band on the bag’s closure is visible at a glance and confirms this is the right bag without requiring the pause to open it and verify the contents. The same colored band used consistently across every trip means the bag is identifiable without any cognitive effort at the specific security checkpoint moment when cognitive effort is being applied to shoe removal, laptop placement, and tray retrieval simultaneously.
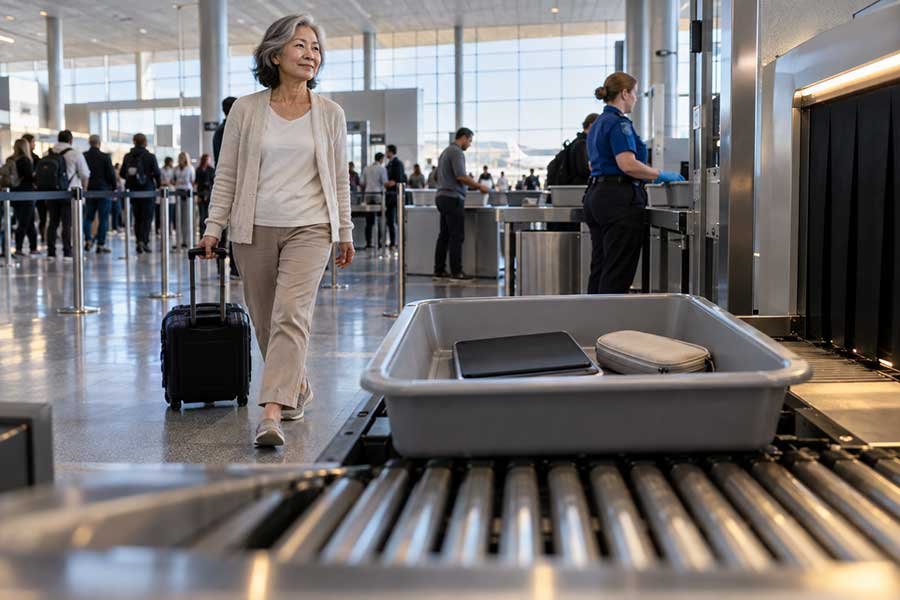
Standard security screening requires laptops to be removed from the carry-on bag and placed in a tray separately for X-ray scanning. The laptop at the bottom of the carry-on, under the clothes, the cable organizer, the toiletry bag, and the book, is the laptop that requires a full carry-on excavation at the security tray — the specific scenario that produces the longest individual security interaction of any single preparedness failure. The laptop in an easily accessible sleeve, either a dedicated laptop sleeve in the carry-on’s exterior or spine pocket, or a laptop bag designed with a security-friendly dedicated compartment that lies flat and opens directly, is removed in five seconds, placed in the tray, collected in five seconds, and returned to its sleeve in five seconds. Total laptop security interaction time under twenty seconds. Total laptop security interaction time for the bottom-of-bag version: one to two minutes of excavation plus re-packing.
The most practical carry-on format for frequent travelers who bring a laptop is the bag with a dedicated laptop sleeve accessible from the exterior or from the bag’s spine panel without opening the main compartment. This format allows the laptop to be removed from the dedicated sleeve without disturbing any other item in the bag, placed directly in the tray, and returned to the sleeve after clearing security without any repacking of the main compartment. The bag that requires opening the main compartment and removing or shifting the primary contents to reach the laptop is the bag that produces the security checkpoint delay regardless of how quickly the traveler moves through the scanner itself.
For travelers who carry a tablet rather than a laptop: confirm whether the specific device requires separate tray placement by consulting the TSA’s current guidelines, as the classification of tablets for security screening purposes has varied across policy periods and airports. In general, tablets larger than a standard cell phone have at various times been subject to the same separate-tray requirement as laptops. When in doubt, place the tablet in its own tray section to avoid the secondary screening request that a screener might make if the tablet’s X-ray image through the bag produces an unclear result alongside the other bag contents. The extra tray item costs thirty seconds. The secondary screening request costs significantly more.
Download TSA’s MyTSA app before departure and use the Can I Bring feature to confirm whether any borderline item is permitted in carry-on, checked bag only, or not at all. The app provides current guidance for a broad range of items, including the specific food, tool, and personal care items most commonly questioned or confiscated at security checkpoints. Checking borderline items before packing rather than at the security checkpoint eliminates the specific scenario of discovering at the tray that the item needs to be checked or discarded, which adds time to the interaction and may mean losing an item that would have been allowed in the checked bag if the traveler had known before packing it in the carry-on.
Find Booking Ideas and Travel Essentials on Our Favorites Page
Our favorites page has helpful booking ideas and travel essentials we have found genuinely useful across many flights. Whether you are planning your next trip or looking for resources that make travel easier and more efficient, it is worth a look.
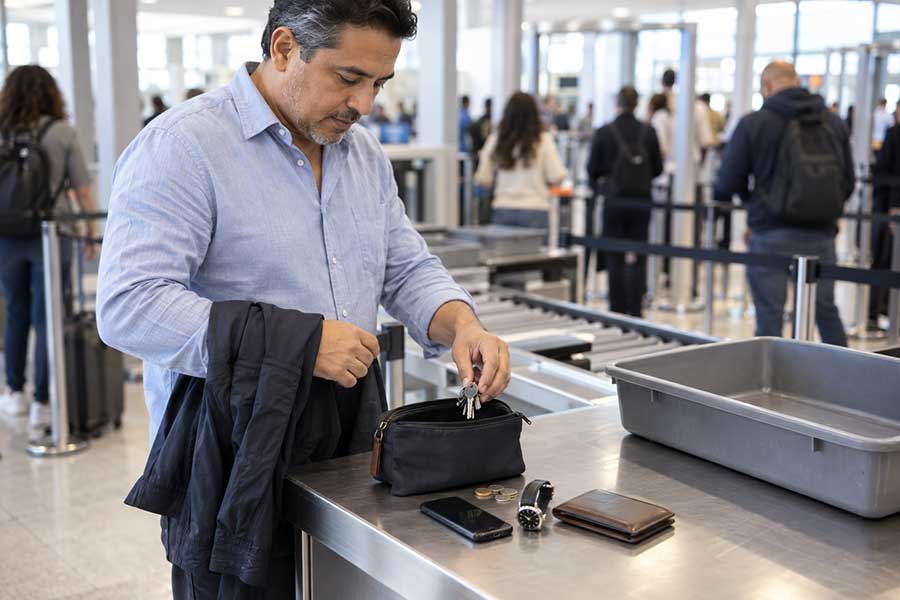
DND FavoritesThe security checkpoint’s metal detector and full-body scanner flag metal and certain non-metal objects with equal efficiency, and the alarm that sounds when a passenger passes through the scanner with a forgotten item in their pocket produces the specific security interaction that every other traveler in the queue watches and waits for: the additional hand screening, the pocket emptying at the scanner rather than at the tray, the specific rechecking of the item that triggered the alarm, and the delay that results. The traveler who empties every pocket before joining the security queue — coins, keys, phone, belt, watch, earrings, and any other metal or electronic item — and places everything in the carry-on or the personal item at the moment of entering the queue is the traveler who walks through the scanner without triggering an alarm for a pocket-item reason.
The pocket-emptying location is the queue, not the tray. The traveler who removes items from their pockets at the tray is the traveler who then needs a tray item for the pocket contents on top of the tray item for the shoes, the tray item for the liquids bag, and the tray item for the laptop. The traveler who places all pocket contents in the carry-on’s exterior zip or the personal item’s top pocket while waiting in the queue needs only the dedicated tray items — shoes, liquids, laptop — and moves through the tray loading process significantly faster. The pocket-emptying in the queue also allows the carry-on zip to be re-closed before reaching the tray, so the collection end of the belt produces a closed, organized bag rather than the open-zippered bag that pocket-emptying at the tray produces when there is not quite enough time to close it again before the tray moves forward.
The belt, if one is worn, is the single item most consistently forgotten in the pocket-emptying process because it is attached to the clothing rather than in a pocket and requires active removal rather than an emptying motion. The travel day outfit that includes a belt requires the belt removal step added to the security preparation routine. A travel day outfit that does not include a belt eliminates the step entirely. For a traveler whose preferred travel day pants require a belt for fit, removing the belt before entering the queue and placing it in the carry-on or coiling it in the tray alongside the other items is the correct sequence. The belt that is forgotten until the scanner alarm produces the specific additional screening interaction whose total time is approximately equal to the time saved by not removing the belt before the queue.
Develop the habit of a pocket-check at the moment of joining the security queue rather than at the tray. A thirty-second routine of touching each pocket location — front left, front right, back left, back right, jacket chest, jacket interior, jacket exterior, any hidden or zippered pocket on the specific travel day outfit — confirms every pocket is empty before the queue advances to the tray. This routine takes thirty seconds once and produces the result of an empty scan at the checkpoint. The same routine developed as a check at the tray rather than the queue produces the same empty scan but with thirty seconds less efficiency and the added inconvenience of the items needing a tray or a carry-on zip that is not yet accessible at the tray rather than in the queue where the carry-on’s exterior zip is easily reached.
TSA PreCheck is the US Transportation Security Administration’s trusted traveler program that provides expedited security screening at over two hundred US airports. Approved TSA PreCheck members use a dedicated security lane where the standard screening requirements that produce the most significant security delays — shoes off, laptops out, liquids bag removed — are waived. TSA PreCheck members keep their shoes on, keep their laptops in their bags, and keep their liquids bag in their carry-on throughout the screening. The PreCheck lane is typically shorter than the standard lane and processes each traveler faster per person because the per-person interaction time is significantly reduced when three of the four most time-consuming security steps are eliminated.
The cost of TSA PreCheck membership is approximately eighty-five US dollars for a five-year membership and approximately seventy US dollars for renewal, though pricing and terms change and should be confirmed at the TSA’s official website before applying. The break-even point relative to the time saved per flight is different for every traveler, but a traveler who flies more than twice a year at a major US airport typically saves fifteen to thirty minutes at security per flight in TSA PreCheck vs. standard lanes, depending on the specific airport, the time of day, and the queue conditions. Across two to four flights per year, the time savings over the five-year membership period produces a return that most frequent travelers consider significant relative to the membership cost.
The TSA PreCheck application requires an in-person appointment at an enrollment center, an identity verification and background check, and the payment of the enrollment fee. Processing time from application to approval typically takes three to five days, with the known traveler number provided by email or text once approved. The known traveler number is entered into airline bookings at the time of booking or in the traveler profile for frequent flyer accounts that allow the number to be stored. Once the number is in the booking, the PreCheck indicator on the boarding pass at most US airports provides access to the PreCheck lane without any additional action at the airport. The enrollment process is straightforward and typically completed in a single visit to the enrollment center lasting approximately ten minutes.
TSA PreCheck applies to flights departing US airports and does not provide expedited screening at international airports. For travelers whose primary travel is international or who fly from non-participating airports, Global Entry may be a more useful consideration because it provides TSA PreCheck benefits plus expedited US customs and immigration processing for returning international travelers. Global Entry’s application process is more extensive than TSA PreCheck’s and its fee is higher, but it includes TSA PreCheck benefits and provides the customs and immigration processing efficiency that international travelers value at re-entry. Both programs require approval and enrollment in advance of travel. Neither benefit applies to flights or checkpoints for which the traveler’s specific booking is not marked with the relevant designation.
Confirm the TSA PreCheck or Global Entry number is in every airline booking, not just the most recent one. A traveler with a valid known traveler number who books a flight without entering it in the booking will not have the PreCheck designation on the boarding pass and will queue in the standard lane for that flight. The number should be stored in the traveler profile for every airline the traveler uses, so it is automatically applied to every booking rather than requiring manual entry at the time of each booking. Check the traveler profile on every airline account once per year to confirm the number is stored, current, and not expired. A TSA PreCheck membership that expired two months before the departure date is the membership that is discovered to be expired at the security checkpoint.
The security-ready system organizes the five hacks into a single coherent routine that begins at home during packing and ends at the security checkpoint’s far side without any of the specific delays that the unprepared version of the same journey produces.
The home preparation: slip-on or easy-removal shoes confirmed as the travel day footwear. Liquids bag packed and placed at the very top of the carry-on’s main compartment or in the most accessible exterior pocket. Laptop in the dedicated sleeve or the security-friendly exterior compartment. All metal jewelry and accessories that would trigger the scanner removed before packing and placed in the carry-on rather than worn on the travel day. Belt placed in the carry-on if the travel day outfit requires it. Travel day outfit reviewed for anything in the pockets that would need to be removed at the checkpoint and emptied to the carry-on before departure.
The security queue routine: enter the queue with the carry-on’s exterior zip accessible. Perform the thirty-second pocket-check routine touching every pocket location. Transfer any pocket contents to the carry-on’s exterior zip. Re-close the zip before reaching the tray station. Remove the laptop from its sleeve or dedicated compartment. Remove the liquids bag from the top of the carry-on or the exterior pocket. Remove the shoes. Load the tray: shoes in the tray’s bottom, liquids bag flat on top, laptop in its own tray if required, personal item in the second tray. Walk through the scanner. Collect the trays in the order they arrive. Shoes on. Liquids bag back in the carry-on’s top position. Laptop back in the sleeve. Carry-on zipped. Move to the seating area away from the belt’s collection zone before performing any additional organization such as returning belt to trousers or replacing jewelry.
The most important element of the system is the last step: moving away from the belt’s collection zone before reorganizing. The traveler who puts their belt back on at the collection counter is the traveler who blocks the collection counter for the traveler behind them whose tray just arrived. The standing-at-the-counter reorganization is the specific security checkpoint behavior that produces the same courtesy-to-the-queue impact as the slow shoe removal, but at the exit end of the checkpoint rather than the entry end. Collect the trays, confirm everything is retrieved, and move ten feet to the seating bench or the nearest clear area before performing any organization that requires more than ten seconds.
When traveling internationally, research the security requirements for each specific departure airport rather than assuming US TSA rules apply globally. Most international airports use either the US standard or the similar European standard for carry-on liquids, but the specific container size limit, the permitted quantity of liquid per container, and the number of containers permitted in the clear bag vary by country and have changed across policy periods. Some airports at specific security alert levels require additional screening steps, additional shoe removal steps, or additional electronics removal steps that the standard checkpoint does not. Five minutes of research before the international departure confirms the specific security requirements for that checkpoint and prevents the discovery of a policy difference at the tray that adds time and occasionally requires discarding items.
The Woman Who Once Held Up the Entire Security Line — and What She Did About It
Vivian had been flying regularly for work for three years when she acknowledged the specific pattern: she was consistently the slowest person at the security checkpoint relative to her own experience level. She knew the rules. She had been through security dozens of times. And she was still the person at the tray loading her laptop from the bottom of a bag that needed to be emptied to reach it, her liquids bag appearing from somewhere in the middle, her phone and keys and work ID card coming out of three different pockets in sequence, and her lace-up ankle boots requiring the sitting-on-the-tray-belt-edge sequence that she had watched other travelers do and that she kept doing herself because she kept wearing the same boots.
The specific incident that produced the change was a morning security interaction at a major hub that she replayed in her head afterward with genuine embarrassment. She had arrived at the tray station, placed her laptop bag on the belt, and begun the excavation. The liquids bag was under the laptop sleeve, which was under the two file folders, which were under the laptop itself. Each layer required removal from the bag, placement in the tray, and a decision about whether it needed its own tray section. Her lace-up ankle boots required sitting on the edge of the belt because the floor of the tray station was not a stable surface for tying. The person behind her waited. The person behind that person waited. The person behind that person said something quiet to the person next to them. Vivian collected her belongings, moved to the seating bench, and timed herself: it took four minutes from the moment she placed the first tray on the belt to the moment she walked away from the security area.
That evening she built the system. She bought a carry-on with a dedicated laptop sleeve accessible from the back panel without opening the main compartment. She moved the liquids bag to a small exterior zip pocket on the carry-on that opened directly and required no other bag interaction. She bought two pairs of leather loafers as her travel day shoes and wore them from that day forward on every flight, regardless of the destination. She developed the pocket-check habit in the queue so nothing remained to be emptied at the tray. She applied for TSA PreCheck the following week, which meant the shoes stayed on and the laptop stayed in the bag at every PreCheck-equipped US airport from that point forward. She applied her known traveler number to her profile at every airline she used regularly.
Her next security interaction at the same hub where the four-minute incident had occurred took forty seconds from first tray to collected bag at the exit side. Forty seconds for the same checkpoint that had taken four minutes six weeks earlier. The difference was not a different checkpoint, a different queue, or a different day. The difference was the system, applied consistently from the moment of packing the night before to the pocket-check in the queue to the exit side move-away-from-the-belt habit at the end. This article is the system she built from the four-minute incident and the person she saw in the queue who had said something quiet to the person next to them.
Beyond the five core security hacks and the complete system, these six additional approaches address the specific security scenarios and edge cases that the experienced traveler has already prepared for.
Avoid wearing metal jewelry on the travel day whenever possible, or remove all metal jewelry and place it in the carry-on before entering the security queue rather than at the tray. Rings, earrings, necklaces, and bracelets with metal closures trigger the body scanner consistently and produce the additional hand screening interaction at the exit of the scanner that adds time and requires a secondary interaction with the security officer. The jewelry removed before the queue is in the carry-on when needed. The jewelry removed at the tray requires a tray item or a pocket placement that then requires another removal at the scanner. The travel day outfit’s jewelry plan should be made at home rather than at the checkpoint.
Arrive at the airport with the boarding pass already loaded or screenshotted rather than opening the airline app at the checkpoint. The boarding pass that requires app loading at the ID check counter is the boarding pass that adds thirty seconds of wait time at the one interaction point that requires the traveler to stop moving. A boarding pass screenshot in the phone’s photo library opens in one tap without any app or connectivity dependency and is available at the ID check counter in three seconds. The digital boarding pass in the airline app requires the app to load, the booking to be retrieved, and the barcode to be displayed — each of which typically takes under ten seconds on a good connection and can take significantly longer on the airport’s Wi-Fi or at low cellular signal.
Keep the ID or passport in the hand or an immediately accessible pocket from the security queue’s entry to the scanner, not in the carry-on or the jacket pocket that requires opening a zipper. The ID check is the first security interaction and requires the ID immediately. The traveler who retrieves the ID from the carry-on’s interior zip at the ID check counter performs the ID-retrieval step that the experienced traveler performs before joining the queue: ID out, boarding pass ready, everything else in the bag. The ID in the hand from queue entry to scanner produces the smoothest possible ID check interaction and also confirms the ID is present and accessible before any step of the security process reveals its absence.
Use the less-crowded security lanes when available and recognizable. Most major airports have multiple security lanes serving the same checkpoint area, and the lanes used by the majority of passengers — the central lanes that most travelers default to because they are most visible and most directly ahead — are consistently longer than the lanes at the checkpoint’s edges. A traveler who arrives at the checkpoint and identifies the shortest lane rather than the most obviously placed one saves time proportional to the queue differential. The ten-second observation of the full checkpoint area before joining any specific lane is the most time-efficient ten seconds available at any airport security checkpoint.
Pack a dedicated clear zip pouch for loose small items — earrings, a watch, coins from the jacket lining — that will be placed in the tray alongside the shoes and the liquids bag. The tray that contains loose earrings, a loose watch, and loose coins is the tray that requires visual confirmation of every loose item before the tray is advanced because every loose item is a possible missing-item anxiety at the collection end. The dedicated small clear pouch that receives all jewelry and small metal items at the pocket-check stage is the tray item whose contents are confirmed complete in one glance because the pouch contains everything rather than the tray containing individual items scattered across the tray’s surface.
At international airports using the European liquids standard or variations of it, confirm the liquids allowance and container size before packing rather than trusting that the US standard applies. The European standard uses the same 100-milliliter container size as the US but has different rules for duty-free liquids purchased after the security checkpoint, different exceptions for prescription medications, and different enforcement patterns at specific airport security levels. The traveler who packs assuming the home country’s standard applies and discovers a policy difference at the tray is the traveler who loses a confiscated item that a five-minute pre-packing research session would have preserved.
Build the security-ready packing sequence into the final five minutes of every packing session rather than as a separate check: after everything is in the bag, confirm in this specific order — liquids bag at the top (touch the exterior pocket or the top layer of the main compartment to physically confirm it is accessible), laptop in the sleeve (access the laptop sleeve and confirm the laptop is in it), all metal items off the body and in the bag (touch the wrists, the neck, the ears, and the pocket locations to confirm nothing is wearing that will trigger the scanner), shoes confirmed slip-on or confirmed pack-the-travel-shoe-and-wear-the-destination-shoe. The entire confirmation takes forty-five seconds. It converts the packing session’s closing step into the security preparation step so the security checkpoint is addressed at the packing stage rather than at the checkpoint where every correction costs queue time rather than packing time.
Book the Destination Worth Getting Through Security Efficiently For
The security system earns its full return when it gets you to the gate quickly for a flight worth boarding. Our travel agents book the trips worth taking. Let us plan yours.
Book A TripCommon Airport Security Mistakes to Recognize and Fix
Every one of these is fixable before the next departure. Every one of them costs time and queue courtesy that the system eliminates entirely.
Wearing lace-up shoes on the travel day
Lace-up shoes at a standard security checkpoint require sixty to ninety seconds of shoe removal and re-tying that slip-on shoes require under ten seconds to manage. The difference is trivial for the individual traveler and meaningful for the queue. For a traveler who flies four times a year across a five-year period, the lace-up shoe choice represents forty to sixty minutes of accumulated security delay that the slip-on shoe eliminates at no cost beyond the shoe choice itself. Travel in slip-on shoes. Pack the lace-ups. Change at the destination if the destination requires them.
Packing the liquids bag anywhere other than the very top of the carry-on
The liquids bag at the bottom of the carry-on requires full bag excavation at the security tray. The excavation takes time, produces a disorganized tray, and makes the re-packing at the collection end of the belt longer than the packing at the entry end was. The liquids bag’s position in the carry-on is a packing-session decision that costs nothing to make correctly and costs thirty to sixty seconds of queue time every time it is made incorrectly.
Packing the laptop in the main bag compartment rather than a dedicated accessible sleeve
The laptop in the main compartment is the laptop at the bottom of the bag, beneath every other item packed after it, requiring the same excavation as the misplaced liquids bag but for an item that is larger, heavier, and harder to place back quickly after screening. The laptop sleeve or the security-friendly exterior compartment is the specific bag feature worth the bag purchase that includes it. The time saved per flight over the life of the bag easily justifies the feature.
Emptying pockets at the tray rather than in the queue
The pocket contents emptied at the tray require a dedicated tray item or a carry-on zip that is now under the tray station’s belt rather than comfortably in hand at the queue’s open space. Emptying pockets in the queue produces organized carry-on placement before the tray is even reached. The pocket-check in the queue is a thirty-second habit that eliminates the specific tray station pocket-emptying scramble entirely.
Reorganizing at the security collection counter rather than moving away from it first
The collection counter is the narrowest bottleneck of the security process: every traveler must pass through it to retrieve their trays, and every traveler standing at the counter performing extended reorganization is blocking every traveler behind them from accessing their trays. Moving ten feet to the nearest bench or clear area before re-tying shoes, restoring jewelry, or reorganizing the bag is the one security courtesy action that the system addresses at the exit rather than the entry. It costs nothing except awareness of the space.
Not storing the TSA PreCheck known traveler number in every airline booking
A valid TSA PreCheck membership that is not stored in the airline booking profile produces a boarding pass without the PreCheck designation, which means queuing in the standard lane for that flight and not benefiting from the membership that was paid for. Storing the known traveler number in every airline account’s traveler profile, confirmed once per year and after any membership renewal, ensures the PreCheck designation appears on every boarding pass automatically without requiring action at each individual booking.
Love Helping Travelers Navigate Every Part of the Journey With Confidence?
The traveler who gets through security quickly, boards calmly, and arrives at the destination ready is the traveler whose journey was planned and prepared for at every stage. If becoming a home-based travel agent who helps people travel better sounds like the right next step, see how the TravelPreneur system works. Earn commissions and build a real business from anywhere.
Become An AgentFrequently Asked Questions
These are the questions travelers ask most often about airport security. Real answers from real frequent travel experience, including the rules that are most commonly misunderstood.
What exactly is the TSA 3-1-1 liquids rule and which items does it apply to?
The TSA 3-1-1 rule as applied at US airport security checkpoints requires that each passenger’s carry-on liquids, gels, aerosols, creams, and pastes be contained in containers of 3.4 ounces (100 milliliters) or less, with all qualifying containers placed in a single clear quart-sized resealable plastic bag, with one such bag per passenger placed separately in the screening tray. The rule applies to a broad range of items including shampoo, conditioner, body wash, moisturizer, sunscreen, toothpaste, contact lens solution, liquid makeup, mascara, lip gloss, deodorant in gel or spray form, and food items with a gel or liquid consistency such as peanut butter, jam, yogurt, and hummus. Prescription and over-the-counter liquid medications in quantities exceeding 3.4 ounces are permitted with declaration to the security officer and may require additional screening; travelers carrying these should inform the officer at the start of the screening process. The TSA’s official website and MyTSA app provide the most current and comprehensive guidance on which items are covered by the rule, which are exempt, and which are permitted only in checked baggage. These resources should be consulted for any borderline item before packing rather than at the checkpoint where a confiscated item cannot be recovered.
What is the difference between TSA PreCheck and Global Entry and which one is right for me?
TSA PreCheck provides expedited security screening at over two hundred US airports, allowing enrolled travelers to use a dedicated lane where shoes stay on, laptops stay in bags, and the liquids bag stays in the carry-on. It applies to departures from participating US airports on participating airlines. Global Entry provides all the benefits of TSA PreCheck plus an expedited US Customs and Border Protection processing lane for international travelers arriving in the United States, reducing the customs and immigration processing time at US international arrival airports. Global Entry’s application process is more extensive than TSA PreCheck’s, includes a background check and an in-person interview at a Global Entry enrollment center or interview appointment at a US port of entry, and carries a higher fee. Global Entry’s fee includes TSA PreCheck, so a traveler who qualifies for and enrolls in Global Entry receives both benefits from a single enrollment. The choice between them is primarily determined by international travel frequency: a traveler who primarily takes domestic US flights benefits most from TSA PreCheck’s simpler and less expensive application. A traveler who takes at least one to two international trips to the United States per year benefits from Global Entry’s combined expedited customs and PreCheck benefits in a single enrollment. Both programs require confirmation that the known traveler number or Global Entry number is stored in every airline and travel booking profile for the benefit to appear on the boarding pass. Current fees, eligibility requirements, and application processes should be confirmed at the official program websites before applying, as these details change.
What happens if you accidentally bring a prohibited item through security?
A prohibited item identified at the security checkpoint produces one of three outcomes depending on the item category. Items prohibited in carry-on bags but permitted in checked bags can be surrendered for checked bag storage if the traveler has a checked bag and the time and logistics allow returning to check-in. Items that are not permitted in any form on the aircraft must be surrendered at the checkpoint, where they are confiscated without compensation. Items that are permitted in quantities above the limit, such as liquids over 3.4 ounces, are typically offered the option of checking the item, mailing it home from the airport, or surrendering it. The discovery of a confiscated item is not a legal issue for the traveler in most cases involving common travel items. The specific prohibited item categories where additional security interaction or legal consequences may apply include weapons, prohibited chemicals, and items specifically designated as security threats, which should be reviewed on the TSA’s official guidelines before any packing that involves items in those categories. The practical approach for the traveler who discovers a prohibited item at the checkpoint is to inform the officer proactively if the item was an honest mistake, which typically produces a more cooperative resolution process than the alternative, and to check the TSA’s guidelines for the specific item before the next trip to understand the correct carry-on, checked bag, or not-permitted classification.
Do full-body scanners at airports pose any health or privacy concerns?
The full-body scanners used at US and international airport security checkpoints are of two primary types: millimeter wave scanners, which use non-ionizing radio waves, and backscatter X-ray scanners, which some airports have phased out. The TSA and the relevant regulatory authorities have evaluated the millimeter wave technology used in currently deployed scanners and have published assessments of the radiation levels and health implications that are available on the TSA’s official website and the relevant scientific literature. Travelers with specific health concerns or implanted medical devices should consult their healthcare provider before flying and inform the security officer of any relevant medical devices or conditions at the start of the screening process, as alternative screening procedures are available. On privacy, US airports’ full-body scanners use software that produces a generic outline rather than an anatomical image and does not retain or transmit images. Travelers who prefer not to use the full-body scanner may request a pat-down alternative at the checkpoint. The alternative pat-down is provided by a same-gender officer in most cases and is available at all checkpoints. For travelers with specific concerns about either health or privacy aspects of airport screening, the TSA’s official information resources provide the most current and authoritative guidance.
Can I bring food through airport security?
Solid food items are generally permitted through US airport security in carry-on bags without restriction on quantity. Liquid or gel food items — including yogurt, peanut butter, jam, hummus, soup, juice, and similar consistency items — are subject to the 3.4-ounce carry-on liquids rule and must comply with the container size and clear bag requirements. Whole fruits and vegetables are generally permitted but may be subject to agricultural restrictions when entering certain countries or states, and should be declared at customs if crossing international or relevant domestic borders. Baby formula, breast milk, and juice for infants are exempt from the liquids rule in reasonable quantities and should be declared to the security officer before screening. Powders, including protein powder, flour, and similar dry food items, are subject to enhanced screening for quantities over twelve ounces in carry-on bags following TSA policy updates, though the specific threshold and procedure should be confirmed at the TSA’s current official guidance. The MyTSA app’s Can I Bring feature provides current guidance for specific food items and is the recommended tool for confirming whether a specific food item is permitted and in what form before packing it in the carry-on.
What should I do if I am selected for additional security screening?
Additional security screening, sometimes called secondary screening or SSSS (Secondary Security Screening Selection), can occur for a variety of reasons including random selection, travel pattern analysis, a boarding pass flagged at booking, or the triggering of the scanner during primary screening. The selection for additional screening is not an accusation and does not indicate that the traveler has done anything wrong. The most productive approach is calm cooperation with the security officers, clear and direct answers to any questions asked, and patience through the additional screening process, which typically involves a physical pat-down, a bag search, or both. Having all documents immediately accessible, being able to account for any unusual items in the bag, and maintaining a cooperative and non-confrontational interaction produces the fastest possible additional screening interaction. If a traveler believes an additional screening interaction has been conducted improperly or that their rights have been violated, the TSA’s official complaint process is the appropriate channel for addressing this, and documentation of the specific incident details while they are fresh is useful for any formal complaint.
The forty-second security interaction that produces the relaxed gate arrival happened at the packing session the night before and the pocket check in the queue. None of it happened at the tray.
Picture the Next Security Checkpoint
The slip-ons are on. The liquids bag is in the exterior pocket. The laptop is in the spine sleeve. You did the pocket check in the queue. You join the tray station. Shoes in the tray. Liquids bag from the exterior pocket in three seconds, flat in the tray. Laptop from the spine sleeve in five seconds, in its own tray. Walk through the scanner. No alarm. Trays arrive. Shoes on in three seconds. Liquids bag in the exterior pocket. Laptop in the sleeve. You move ten feet to the bench before closing the carry-on’s top zip. Forty seconds from the first tray to walking away. That is the system. That is every security checkpoint from here.
One More Thing Before You Pack for the Next Flight
Print our free Travel Packing Checklist and use the security preparation category to confirm every security-ready element is in place before the bag is zipped. The liquids at the top, the laptop in the sleeve, the slip-on shoes confirmed, the pocket items relocated to the bag. Forty-five seconds of packing confirmation the night before. Forty seconds at the checkpoint the next morning. The same checklist we recommend before every flight we take.
Get the Free ChecklistExplore Our Top Picks for a Better Trip
Visit our favorites page for helpful booking ideas and travel essentials that we have found genuinely useful across many flights and trips. Whether you are planning your next adventure or looking for resources that make traveling easier from security to landing, it is worth exploring.
See Our Top PicksTravel Prints and Printables From Our Shop
Visit Premier Print Works for travel preparation printables, packing checklists, flight day organizers, travel journals, and wall art that makes every trip a little more beautiful and a lot more organized from the evening the carry-on is packed to the morning the security checkpoint is cleared in forty seconds.
Visit Premier Print WorksDisclaimer
The information shared in this article is provided by Don and Diana’s Travels for general informational, educational, and inspirational purposes only. It reflects our personal experiences, opinions, and publicly available information about airport security procedures. It is not professional legal, security, or regulatory advice, and it should not be relied on as such.
TSA and Airport Security Policy
TSA security policies, liquids rules, prohibited items lists, PreCheck eligibility and fees, and all related security procedures change frequently and vary by airport, airline, route, country, and security alert level. Always confirm current TSA security requirements at the official TSA website (tsa.gov) and at the relevant international airport authority before every trip. We are not affiliated with the TSA or any airport authority and receive no compensation for mentioning any government program. We are not responsible for any security outcome, confiscated item, missed flight, or related consequence arising from information in this article.
TSA PreCheck and Global Entry
TSA PreCheck and Global Entry program fees, eligibility requirements, enrollment processes, participating airports and airlines, and terms of participation change and should be confirmed at the official program websites before applying. Approval for these programs is at the discretion of the relevant government authority and is not guaranteed. We are not responsible for any outcome related to applications, approvals, or use of these programs based on information in this article.
International Airport Security
International airport security requirements vary by country, airport, and applicable security level and may differ significantly from US TSA requirements. Always research the specific security requirements for international departure airports before travel. We are not responsible for any security outcome at international airports based on information in this article.
Health and Privacy Information
The information in this article about airport screening technologies is general educational information only and not professional medical or legal advice. Travelers with specific health concerns, implanted devices, or other medical considerations should consult a healthcare provider and inform security officers at the checkpoint. Travelers with privacy concerns about airport screening should consult the relevant airport authority’s official information resources.
Affiliate and Partner Links
This article may contain affiliate links, partner links, referral links, and links to products or services that pay us a commission. If you click a link and make a purchase or complete any qualifying action, we may earn a small commission at no extra cost to you. Our recommendations are based on real use and genuine belief in the products and services we share.
Third-Party Websites and Services
We may link to third-party websites, services, and resources for your convenience. We do not control these sites and are not responsible for their content, terms of service, pricing, availability, or any product or service they sell. Your use of any third-party site is entirely at your own risk.
Health, Safety, and Personal Responsibility
Travel involves personal risk. You are solely responsible for your own health, safety, travel insurance, medications, vaccinations, documentation, financial decisions, and choices while planning or taking any trip. We strongly recommend purchasing comprehensive travel insurance for every trip. Don and Diana’s Travels, its owners, employees, contractors, and affiliates accept no liability for any loss, injury, illness, delay, cancellation, damage, theft, or inconvenience arising from your use of the information in this article or from any travel decisions you make.
Composite Stories and Characters
Some stories, examples, and traveler experiences shared on this site are composites drawn from the real experiences of Don, Diana, clients, friends, and travelers we have worked with over the years. Names, identifying details, locations, and circumstances may be combined, changed, or fictionalized to protect privacy. Any resemblance to a specific real person beyond the composite portrayal is unintentional.
No Guarantees
We do not guarantee any specific result, outcome, savings, or experience from using the information, tips, services, or products mentioned in this article. Your results depend on many personal factors including your own choices, effort, circumstances, and external conditions outside of our control.
Copyright and Use
All content in this article is the copyrighted property of Don and Diana’s Travels unless otherwise noted. You may not copy, republish, redistribute, modify, sell, or reuse our content without our prior written permission. You are welcome to share a direct link to this article with proper credit.
By reading and using the information in this article, you acknowledge that you have read, understood, and agree to this disclaimer in full.