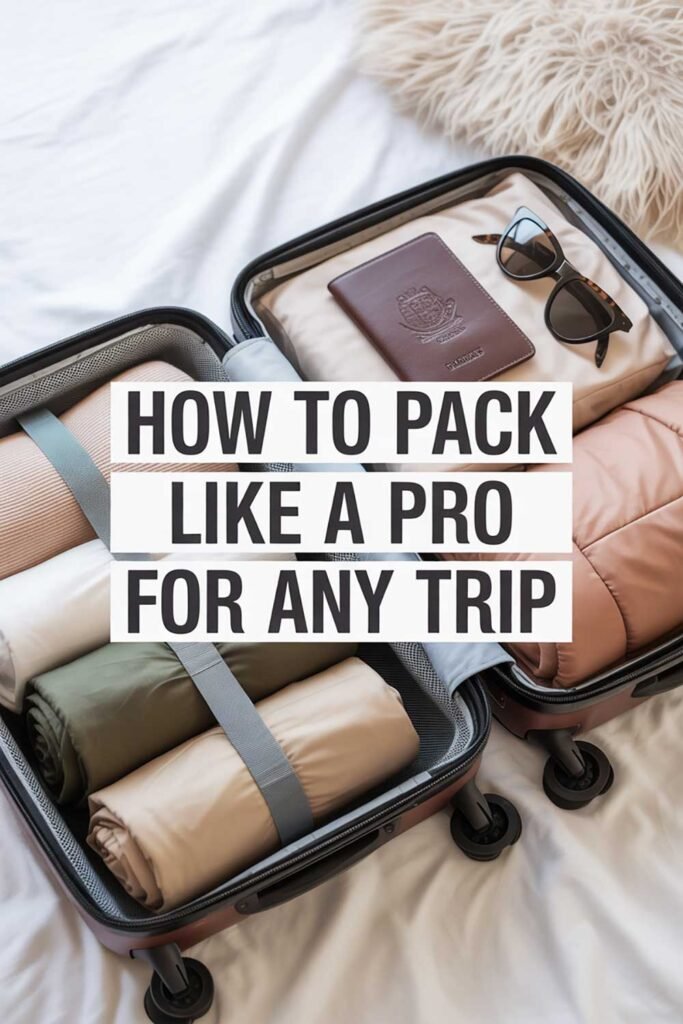
31 International Packing Tips for Travelers Leaving the Country
International travel is the trip type where the difference between prepared and unprepared is felt most acutely and most immediately — at the check-in desk where the passport validity is confirmed, at the boarding gate where the entry authorization is checked, at the foreign ATM where the card either works or does not, and at the customs hall where what was or was not declared determines the next twenty minutes. The domestic trip whose preparation was imperfect produces mild inconvenience. The international trip whose preparation was imperfect produces a different category of problem entirely.
These thirty-one tips cover the full preparation system for international travel — the documents, the financial preparation, the clothing considerations specific to different destination cultures, the organizational systems that make every international checkpoint smooth, and the customs and border habits that produce the calm arrival rather than the anxious one. The international trip that goes well was almost always prepared correctly at home, in the days and weeks before the departure, not at the terminal when the preparation window had already closed.
Free Download: Our Travel Packing Checklist
Before the international bag closes, our free Travel Packing Checklist confirms every document, every essential, and every pre-departure step specific to leaving the country. Download it free and use it before every international trip.
Get the Free ChecklistDocuments and Pre-Departure Preparation: The International Checklist That Cannot Be Improvised
The domestic trip whose preparation was done the morning of departure mostly works. The international trip whose preparation was done the morning of departure occasionally does not — and the consequences of the specific items not handled before departure range from an inconvenient fee to being denied boarding. These tips cover the preparation that must happen before the departure date, not on it.
1. Confirm passport validity well before booking — most destinations require six months beyond the return date
The majority of international destinations require the traveler’s passport to be valid for at least six months beyond the date of the return flight as a condition of entry. A passport valid through the travel dates is not always sufficient. A passport that expires three months after the return date from a destination with a six-month validity requirement will be denied boarding or denied entry regardless of how many prior visits the traveler has made to the same destination. Check the specific passport’s expiry date against the specific destination’s requirements before booking anything that depends on it. Passport renewal takes weeks to months — confirm validity before the booking, not after the flights are purchased.
2. Research and secure every entry requirement well before the departure date
The visa, the electronic travel authorization, the tourist card, the specific health documentation requirement — every international destination has entry requirements whose specifics are published by the destination country’s immigration authority and whose non-compliance results in boarding denial or entry refusal. These requirements change, are updated without widespread notification, and vary by the specific passport held. Check the destination’s current entry requirements from an official source — the destination country’s embassy or immigration website — in the weeks before departure, not the day before. The entry requirement researched with time to address it is an administrative task. The entry requirement discovered at check-in is a crisis.
3. Purchase and confirm travel insurance before the first booking is non-refundable
Travel insurance purchased before any non-refundable booking is made covers the full trip’s financial exposure from the moment coverage begins. Travel insurance purchased the day before departure covers only the events that occur after that date — not the illness that developed before it, not the airline that went into administration three weeks before departure, not the family emergency whose timing did not cooperate with the coverage window. Purchase travel insurance when the first non-refundable booking is made. Screenshot the policy number, the emergency assistance number, and the claims procedure. Save both to the camera roll album before departure. The insurance that is needed most urgently is needed most urgently in the specific moment when searching for the policy number is least convenient.
4. Notify the bank for every destination country at least twenty-four hours before departure
The card frozen at the first international ATM is the most common and most entirely preventable international travel financial problem. Every bank’s fraud system flags unfamiliar foreign transactions as suspicious without a travel notification on file. A five-minute online or phone notification — destination countries, travel dates, primary and backup cards — converts both cards from potential liabilities at the worst possible moment into confirmed working tools at every payment terminal and ATM across the trip. Twenty-four hours before departure. Every international trip. Without exception. The bank notification that feels unnecessary every trip it does not produce a frozen card is the bank notification that would have been the only relevant thing about the trip where it did.
5. Photograph every critical document and save the photos to a camera roll album and an emailed backup
The passport photo page, the travel insurance policy details, the visa or entry authorization confirmation, the airline booking references, the accommodation addresses and phone numbers — every critical document photographed and saved to a dedicated camera roll album before departure, and emailed to a personal address accessible from any device anywhere in the world. The physical loss of every document at a foreign destination is the scenario this backup addresses. The camera roll album opens offline in one tap at any checkpoint where a document is needed. The email backup opens from any internet-connected device at any destination location regardless of what happened to the phone. Both take ten minutes to create before departure. Both take hours of problem-solving to compensate for when they were not created.
6. Research the destination’s specific customs restrictions before packing
Every country maintains a list of items that are restricted or prohibited at the border — specific foods, certain medications, plant materials, animal products, currency above declared limits, some electronic items, and in some destinations entire product categories that are legal in the departure country and illegal at the destination. The item confiscated at customs is the item that was legally purchased, packed in good faith, and surrendered because the destination’s restrictions were not researched before it was packed. Check the destination country’s customs authority website for current restrictions before packing. The prescription medication whose importation requires documentation. The specific food whose presence in the bag without declaration produces a fine. The knowledge acquired in ten minutes before packing is the knowledge whose absence produces the customs hall problem.
7. Confirm the international baggage allowance for every carrier on the itinerary before packing
International baggage allowances differ from domestic ones on the same carrier, and the allowances on the outbound carrier may differ from the allowances on the connecting or return carrier. The traveler who packs within the domestic allowance they are familiar with and flies an international carrier whose allowance is different arrives at the check-in counter with a bag whose weight produces a fee. Confirm the specific allowance — both size and weight — for every carrier on every leg of the international itinerary before packing begins. Pack within the most restrictive allowance on the itinerary. The international overweight fee is almost always more expensive than its domestic equivalent and is always entirely preventable by the pre-packing confirmation that takes five minutes.
Book A Trip
Book the next international trip with a travel agent who knows the entry requirements, the right carriers, and every detail that turns an international departure into the smooth experience it should be.
Book A TripThe International Packing Essentials: What Every Trip Leaving the Country Requires
International travel has a specific set of packing essentials whose domestic equivalents are either unnecessary or less critical — the universal adapter whose absence means no charging at the destination, the no-foreign-transaction-fee card whose absence means paying two to three percent on every purchase, the unlocked phone whose absence means no affordable local data. These are the items that earn their space specifically because the destination is outside the home country.
8. Confirm and pack the right travel adapter for the destination’s outlet type
Outlet configurations vary across international destinations in ways that make a universal travel adapter one of the most practically essential items for any trip leaving the country. The UK uses a three-pronged configuration. Continental Europe uses two round pins. Japan uses flat two-pin outlets at a different voltage from North America’s. Australia and New Zealand use angled two-pin configurations. A universal travel adapter covering the major outlet types — or a destination-specific adapter confirmed against the specific destination — is the item that charges every device at the hotel without a search for a compatible outlet, a conversion plug, or the specific humiliation of arriving at a destination with every device at low battery and no way to charge them without the adapter left at home. Confirm the destination’s outlet type. Pack the correct adapter. In the carry-on where it is accessible on arrival day before the checked luggage.
9. Pack prescription medications in original packaging with documentation for every international trip
Every prescription medication carried across an international border should travel in the original pharmacy-labeled packaging and be accompanied by the prescribing physician’s documentation — a letter confirming the diagnosis, the medication name and dosage, and the prescribing doctor’s contact information. Some destinations require additional documentation for controlled substances, and some medications that are legal in the departure country are controlled or prohibited at specific destinations. Research the destination’s specific medication import requirements for every prescription before departure. The original packaging and the physician’s letter convert the medication from a potential customs concern to a documented legitimate personal medical item at every border. Travel without them in the destination that requires them and the customs interaction changes character significantly.
10. Use a no-foreign-transaction-fee card as the primary payment card for all international purchases
The standard credit or debit card’s foreign transaction fee — two to three percent on every international purchase — accumulates across every restaurant meal, every accommodation charge, every market purchase, and every transport booking across the trip’s full duration into a meaningful sum charged for no service received. A card with no foreign transaction fee is widely available through most major banks and credit card issuers. Apply for one before the next international trip. Use it as the primary payment card for every international purchase. The saving is automatic, applies to every transaction, and requires no behavioral change beyond using the right card. The two to three percent recovered across a two-week international trip represents the saving whose daily individual invisibility belies its cumulative significance.
11. Arrive at the destination with a small amount of local currency for the first hours
The arrival at an international destination without any local currency produces the specific dependency on the airport’s currency exchange — whose rate is the worst available at any legal exchange point in the destination — or the airport ATM — whose transaction fee is typically higher than the city ATM whose rate is better. A small amount of local currency exchanged at a home-city bank or exchange office before departure covers the taxi from the airport, the first meal, and the incidental cash purchases of the arrival day at a rate significantly more favorable than the arrival terminal provides. Not the full trip’s cash requirement — just enough for the first hours before the city ATM is accessible at the preferred rate.
12. Store a backup payment card separately from the primary travel wallet
The primary travel wallet lost or stolen is the event that leaves the traveler without financial access at a foreign destination unless the backup card stored separately from the wallet is available. The backup card in the main bag’s interior pocket, the hotel safe, or the money belt that was not in the same location as the primary wallet is the financial continuity plan for the specific scenario whose probability is low and whose consequence without preparation is serious. Store the backup card before departure. Keep it separate from the primary wallet throughout the trip. The backup that was never needed is the backup that cost nothing to carry. The trip without a backup that needed one is the trip whose story involves an emergency call to a bank from a foreign country.
13. Confirm phone unlocking and international data before departure
The locked phone that cannot accept a local SIM at the destination and the data plan that charges international roaming rates at two to ten dollars per megabyte are two versions of the same problem: arriving at an international destination without affordable mobile data, which in the era of offline-map-dependent navigation, translation apps, and booking confirmation screenshots means arriving less capable than the preparation-equipped version of the same trip. Confirm whether the phone is unlocked before departure. Research the carrier’s international data options — a specific international day pass, an unlocked phone with a local SIM, or a travel SIM purchased before departure — and confirm the solution before the departure date when every option is available and affordable.
Plan Our Escape
Let us plan the international trip from the first booking to the final accommodation — the right destination, the right routing, and every detail that makes the preparation these tips describe feel easy rather than overwhelming.
Plan Our EscapeClothing for International Travel: Packing for a Different Country’s Context
International travel introduces clothing considerations that domestic travel does not — the cultural dress expectations of the destination country, the climate range of a trip that may span multiple regions or seasons, and the specific occasions produced by destinations whose social norms are different from the traveler’s home context. These tips address the clothing decisions that international travel specifically requires.
14. Research the destination’s cultural dress expectations before selecting any clothing
Every destination has cultural norms around clothing whose degree of formality, coverage, and appropriateness varies in ways that affect both the traveler’s comfort and their welcome in the specific environments the trip involves. The religious site that requires covered shoulders and knees. The conservative community whose public dress standards are different from the traveler’s home city’s norms. The beach resort region where swimwear is appropriate at the beach and inappropriate in the market town two kilometers away. Researching the destination’s specific cultural dress context before packing — not from a general sense that it might be more conservative, but from the specific requirements of the specific places on the specific itinerary — produces the wardrobe that navigates every environment the trip contains without the specific discomfort of being visibly and unnecessarily out of place.
15. Confirm the destination’s climate range across the full travel dates before selecting clothing
The international trip whose clothing was selected from a general impression of the destination’s climate rather than the specific climate during the specific travel dates is the trip that most commonly produces the wrong wardrobe. Southeast Asia in its cool season is dramatically different from Southeast Asia in its hot season. Europe in October requires different clothing than Europe in July. The Andes at altitude requires different layers than the Pacific coast at the same latitude and the same time of year. Confirm the destination’s average temperatures, rainfall, and conditions for the specific weeks of the trip from a weather resource that provides historical data. Pack for what the destination actually produces during the specific travel window, not for the general impression of what the destination is like.
16. Pack layers for the temperature range the itinerary actually spans
The international itinerary that spans multiple cities, multiple altitudes, or multiple climate zones in a single trip produces the specific clothing challenge of packing for a range rather than a fixed temperature. A base layer, a mid-layer, and an outer layer that can be combined across the range produces more outfit combinations from fewer items than the same number of pieces in fixed-temperature-appropriate weight. The packable down jacket that compresses to the size of a grapefruit covers the chilly evening in the mountain town and the cold restaurant air conditioning in the beach city and the early morning at the airport whose terminal runs twenty degrees colder than the destination’s midday temperature. Layers. Every international itinerary that spans more than one climate context.
17. Pack one smart-casual outfit that handles the unexpected elevated occasion
International travel consistently produces the unexpected elevated occasion — the invitation to a local family’s dinner, the restaurant whose reputation was not known before arrival but whose dress standard becomes apparent at the door, the cultural performance whose audience dresses at a standard the traveler did not prepare for. One smart-casual outfit — not formal, not business attire, but the elevated version of the trip’s casual wardrobe — confirmed as a complete look before packing and available throughout the trip covers every unexpected occasion without requiring a local clothing purchase or the specific embarrassment of being the only person underdressed in an environment that expected otherwise.
18. Wear walking shoes that have been broken in before departure
New shoes worn for the first time at an international destination that involves significant walking produce the blister problem before the trip’s first full day is complete. International travel typically involves more walking than the home environment — unfamiliar transport systems, dense historic city centers, distances between attractions that are navigable on foot but longer than the distances managed daily at home. Break in every new shoe that will be worn for significant walking at the destination before the departure — on full walking days at home, not on a brief test wear. The blister that forms on day two of a two-week international trip is the blister that affects every subsequent walking day and whose prevention required nothing more than wearing the shoes before the trip began.
19. Pack a packable rain layer for every international trip regardless of the forecast
The weather forecast for a foreign destination checked at home before departure is the most optimistic version of what the specific days at the destination will produce. International travel introduces the specific vulnerability of being in an unfamiliar environment when the weather changes — far from the home wardrobe’s options, unfamiliar with the local shops whose shelter the rainy afternoon requires, dependent on the packed bag’s contents for the full range of conditions the trip produces. A packable rain jacket or poncho — compressing to the size of a softball, under three hundred grams — covers every weather scenario the international trip produces at minimal bag cost and produces the specific calm of never being at the mercy of a forecast that was wrong.
DND Resources
Our travel resources page has trusted tools and official sources for every stage of international travel preparation — including government travel advisories, visa information, and destination-specific planning resources.
DND ResourcesOrganization for International Travel: The Systems That Make Every Checkpoint Smooth
International travel involves more checkpoints, more document requests, and more organizational precision than domestic travel — the immigration officer who requires the onward travel confirmation, the customs declaration that must reflect what is actually in the bag, the hotel check-in whose address was needed for the immigration card completed on the aircraft. These organizational systems ensure that every document is available at every moment it is required.
20. Use a slim travel wallet with permanently assigned slots for every international document
The passport in one slot. The airline boarding pass in one slot. The primary payment card in one slot. The backup card in the interior zip pocket. The travel insurance card in one slot. The local currency in the cash slot. Permanently assigned, never shuffled, the same configuration on every international trip. The travel wallet opened at any international checkpoint — immigration, customs, hotel check-in, currency exchange — produces the right document in one reach because the system knows where it is regardless of how much time pressure the checkpoint applies. Choose the wallet before the first international trip that uses it. Assign the slots. Keep the assignments permanently.
21. Build a dedicated camera roll album for every international trip
Every booking confirmation, every visa or entry authorization, every transportation reference, every accommodation address and emergency contact — screenshotted and saved to a dedicated album created at the time of the first booking and labeled clearly by destination and date. The album opens in one tap at every checkpoint where documentation is needed. It opens offline. It opens when the phone has no signal and the email inbox requires connectivity to search. It opens when the specific booking reference is needed at the immigration desk and the alternative is searching through an inbox for an email received three months ago while the officer waits. Build the album. Add every document to it as each booking is made. Arrive at every international checkpoint knowing the album holds every document the checkpoint might request.
22. Download offline maps for every destination city before the flight lands
The offline map downloaded for every city on the international itinerary before the arrival flight lands is the navigation tool that works from the moment the wheels touch down — before the local SIM is active, before the hotel WiFi is connected, before any international data plan is confirmed working. The taxi route from the airport, the distance from the accommodation to the first day’s destination, the location of the nearest ATM to the hotel — all navigable offline from local storage at zero data cost. Download before each destination’s arrival. Confirm each download works offline before the device goes in the bag. The map that loads in two seconds from local storage is never the map being waited on in an unfamiliar city.
23. Create a single trip document with every critical piece of information for the journey
One document — a notes file, a Google Doc, a single printed page — holding every flight number, every accommodation name, address, and phone number, every booking reference number, every destination’s emergency services number, the travel insurance emergency line, the bank’s international collect call number, and the nearest embassy or consulate contact for the home country. This document is the operational reference for every scenario the international trip produces — from the straightforward check-in that needs the booking reference to the medical emergency that needs the insurance policy number to the lost passport that needs the nearest consulate’s address. Create it before departure. Save it to the phone, email it to a personal address, and print one copy that stays in the main bag’s interior pocket. The information assembled at home in ten minutes is the information available at the destination in three seconds.
24. Confirm accommodation check-in details the evening before each arrival
The accommodation check-in time, the specific entrance location, the key collection process, any check-in documentation required — confirmed the evening before each arrival while the alternative is still available. The accommodation booked three months ago and not revisited until the taxi approach may have moved its check-in time, updated its entrance location, or changed its self-check-in process. The confirmation the evening before catches every update while alternative arrangements are still possible. The discovery at the door after a long international flight that the check-in window closed two hours ago is the discovery that the evening-before confirmation would have resolved before the flight departed.
25. Keep a printed backup of the passport photo page, travel insurance, and key contacts
A single printed page — the passport photo page, the travel insurance policy number and emergency line, the booking references for the first accommodation and the onward flight, and the nearest home-country consulate address — stored in the main bag’s interior pocket separate from the phone and the digital backups is the document system that functions when the phone is dead, lost, or stolen and every digital backup is temporarily inaccessible. Paper does not require a battery. Paper does not require a password. Paper found in the bag’s interior pocket while the phone is being replaced at the destination’s phone shop is the printed backup that bridges the gap the digital system cannot cover alone. One page. Printed before every international departure. Stored in the bag. Replaced with the next trip’s version for the next departure.
How Elio Built an International Preparation System That Never Produced a Surprise
Elio had traveled internationally a dozen times before the trip that changed his preparation approach. The previous trips had all worked out — some minor inconveniences, a couple of moments of searching for documents that should have been more accessible, one frozen card at a foreign ATM that required a thirty-minute phone call to resolve — but nothing that had crossed the threshold from inconvenience to actual problem. The trip that changed the approach was the one to a destination that required a specific entry authorization whose existence Elio had not known about, had not researched, and discovered at the check-in counter forty-five minutes before boarding when the agent asked for the authorization code that had not been applied for.
The flight was missed. The authorization took four days to process. The accommodation reservation could not be moved. The travel insurance covered the additional costs — the insurance purchased before the non-refundable bookings, which was the one preparation habit that had always been in place. The total disruption was four days, several hundred dollars, and the specific education of discovering at a check-in counter what every official source would have told him weeks earlier if the research had been done. The authorization requirement was published clearly on the destination country’s immigration website. It had simply never been checked.
After that trip, every international departure began with the same ten-minute research session conducted the week of booking rather than the week of departure: the destination’s entry requirements from the official source, the passport validity against the six-month rule, the bank notification calendar reminder set for forty-eight hours before departure, the camera roll album created with the first screenshot. These thirty-one tips are the complete version of the research session and the organizational system it produced. The international trip that produces surprises at the terminal was almost always the one whose research was not done before it.
Become An Agent
Love helping travelers navigate every international preparation requirement and arrive at every destination ready to enjoy it? See how to turn that into a home-based travel business.
Become An AgentAt the Border and Customs: The Arrival That Stays Calm
The border and customs process at an international arrival is the final checkpoint whose outcome depends entirely on the preparation done before departure. The declaration that is accurate, the bag whose contents are compliant with the destination’s restrictions, and the documents that were organized before boarding are the inputs that produce the calm arrival rather than the one that begins the trip’s first day in a customs hall.
26. Complete the customs declaration card accurately and completely
The customs declaration card completed on the aircraft or at the customs kiosk is a legal document whose accuracy is a legal requirement. Declaring all goods above the destination’s duty-free limit, declaring all food items, declaring all currency above the required declaration threshold, and declaring any items whose importation requires documentation — including prescription medications — produces the customs interaction that clears in the standard processing time. The declaration whose inaccuracy is discovered by a customs officer produces the secondary inspection, the potential seizure of the undeclared item, and in some destinations the penalty whose amount reflects the value of the goods rather than the traveler’s intent. Declare accurately. The declaration that reflects what is in the bag takes three minutes. The customs problem whose cause was the declaration that did not reflect what was in the bag takes significantly longer.
27. Know the destination’s duty-free limits for items purchased abroad before packing them
The returning traveler’s duty-free allowance — the specific monetary value of goods, the specific quantities of alcohol and tobacco, and any other category-specific limit — is published by the home country’s customs authority and is the limit whose exceedance produces the duty charge at re-entry. Knowing the limits before purchasing items at the destination prevents the specific calculation at the customs desk of what the goods are worth and what the duty on the exceedance amounts to. Check the home country’s customs authority website for current returning traveler allowances before the trip. The purchases made with this knowledge are the purchases whose importation was planned for. The purchases made without it are the ones discovered to be dutiable at the final airport.
28. Never pack restricted items based on an assumption — verify against the destination’s current list
The assumption that a specific item is fine to bring to a specific destination because it was fine at the last destination, or because it is legal at home, or because nobody mentioned it being a problem — this assumption is the source of the customs hall’s most common preventable problems. Restrictions change. Destinations differ. The same medication, food item, or product that entered one country without issue may be restricted, prohibited, or documentation-dependent at the next. Verify every potentially restricted item against the destination’s current published customs authority list before packing it. A five-minute search before the item goes in the bag is the research that prevents the twenty-minute customs interaction on arrival.
29. Declare food items — the customs declaration standard is always declare when uncertain
Most international destinations restrict or prohibit the importation of certain food items — fresh fruits and vegetables, meat products, dairy items, seeds, and plant materials — whose potential introduction of pests or diseases the customs system is specifically designed to prevent. The declaration standard for food is always declare when uncertain rather than assume permitted. The declared food item that is permitted is waved through. The declared food item that is not permitted is surrendered without penalty. The undeclared food item that is discovered in inspection — the apple from the flight, the sandwich from home, the seeds purchased at the previous destination — produces the penalty whose amount and consequence vary by destination and whose cause was a declaration decision made in thirty seconds on the aircraft. Declare food. Every time. The declaration is free. The non-declaration of the discovered item is not.
30. Keep all receipts for significant purchases made during the trip
The receipt for every significant international purchase — any item whose value approaches or exceeds the home country’s duty-free limit, any item whose value might be questioned at customs, any item purchased as a business expense whose documentation supports a tax deduction — kept in the travel wallet’s designated receipt slot or the trip’s designated receipt pouch throughout the trip is the documentation that supports every customs declaration made at re-entry and every tax claim made after it. The receipt for the specific item purchased at the destination market at a price that places it close to the duty-free limit converts the customs calculation from an estimate to a documented fact. Keep the receipts. They weigh nothing and they produce specific value at the specific moments the trip’s final accounting requires them.
31. The calm arrival at any international destination was prepared at home
Every international arrival checkpoint — the immigration officer who confirms the onward ticket, the customs officer who asks whether anything has been declared, the hotel front desk that requests the booking confirmation — is a moment whose outcome was determined before the aircraft boarded. The passport whose validity was confirmed. The entry authorization that was obtained. The customs declaration that accurately reflects the bag’s contents. The booking reference in the camera roll album. The travel insurance emergency number in the trip document. The bank notification that prevents the frozen card at the airport ATM. None of these interventions happen at the checkpoint. They happen in the days and weeks before departure when there is still time, still options, and still the calm to address each one correctly. The international traveler who passes through every checkpoint without delay did not have an easy trip. They had a prepared one.
Picture This
The passport was confirmed valid for nine months beyond the return date. The destination’s entry requirements were checked from the official immigration website three weeks before departure — no visa required for the specific passport, the eTA applied for and confirmed in the camera roll album the same day. The travel insurance was purchased the week the first non-refundable booking was made. The bank was notified forty-eight hours before departure — both cards confirmed active for every destination country. The camera roll album held every confirmation, every booking reference, every address. The trip document had every emergency contact and every policy number. The printed backup was in the main bag’s interior pocket.
At the international departure, the boarding pass opened in one tap. The carry-on was organized for security. The customs declaration card completed on the aircraft was accurate — the medication in original packaging with the physician’s letter, the one food item declared. At immigration, the passport was valid, the eTA confirmation was in the album, and the officer’s question about onward travel produced the return booking reference in twelve seconds. At customs, the declaration was processed without secondary inspection. At the hotel, the check-in confirmation was in the album before the agent asked for it.
The trip began at the hotel lobby rather than in a customs hall or at an immigration desk waiting for a document search to resolve. The first evening was the destination. The preparation was behind it and invisible in the way that all good preparation is — not noticed because nothing went wrong, and nothing went wrong because the preparation was right. That is thirty-one tips. That is the international arrival that was calm because the preparation was done before it was needed.
Before the Next International Trip: Grab the Free Packing Checklist
Our free Travel Packing Checklist is the international packing foundation these thirty-one tips describe — every document confirmed, every essential in its position, and every pre-departure step done before the departure date when every option is still available. Download it free.
Get the Free ChecklistExplore Our Top Picks for a Better Trip
After years of international travel together, these are the booking platforms and travel services we personally rely on — tested, trusted, and recommended because they have consistently made our own international trips smoother, better prepared, and more memorable.
See Our Top PicksTravel Printables at Premier Print Works
Visit Premier Print Works for international travel checklists, document organization guides, trip planners, and preparation printables that make every international departure more organized and every arrival smoother than the one before it.
Visit Premier Print WorksDisclaimer
The information shared in this article is provided by Don and Diana’s Travels for general informational, educational, and inspirational purposes only. It reflects our personal experiences, opinions, and the experiences of travelers we have worked with. It is not professional travel, legal, immigration, customs, medical, or financial advice.
Entry requirements, visa policies, customs regulations, duty-free allowances, and passport validity requirements vary by destination country, passport held, and date and are subject to change without notice. Always confirm current requirements directly from official government sources — the destination country’s official immigration authority and customs authority — well before departure. Information in this article reflects general principles and may not reflect current requirements for specific destinations. We are not responsible for any outcome arising from reliance on information in this article.
References to prescription medications, travel insurance, and financial products are general educational information only. Always consult a qualified healthcare provider for advice specific to your medical circumstances, a licensed insurance professional for advice specific to your coverage needs, and a qualified financial advisor for advice specific to your financial circumstances. This article may contain affiliate and partner links that pay us a commission at no extra cost to you. Stories on this site combine real experiences from Don, Diana, clients, and travelers we have worked with. Details may be adjusted for privacy and narrative clarity. All content is the copyrighted property of Don and Diana’s Travels. You may not copy or republish our content without prior written permission. By reading this article you acknowledge that you have read and agree to this disclaimer.