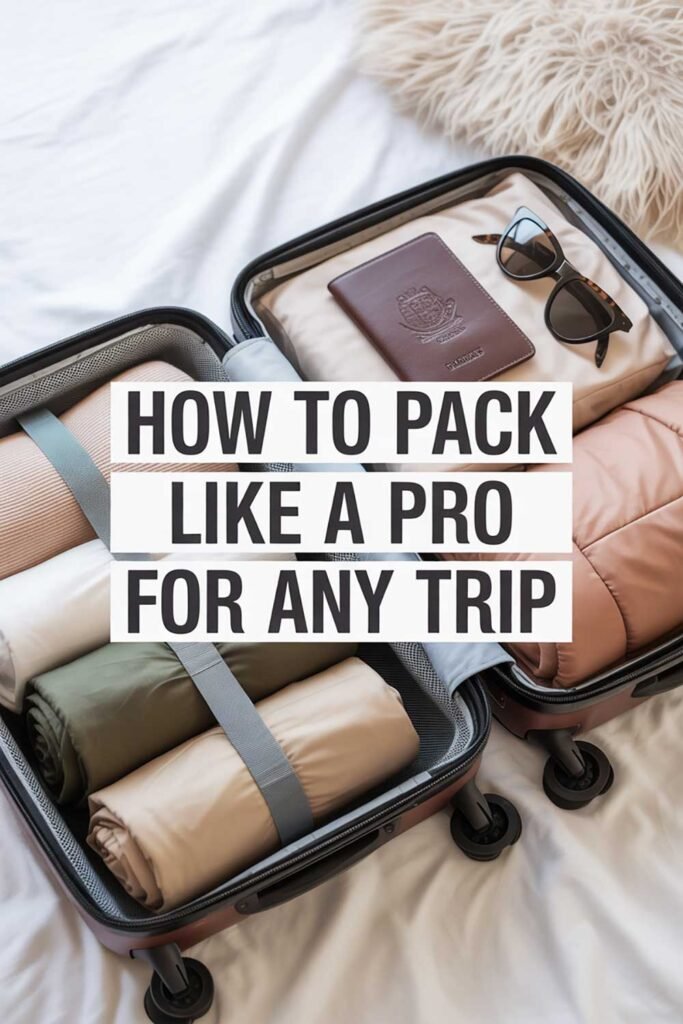
27 Airport Travel Tips That Make Flying So Much Easier
The airport does not have to be the part of the trip you just endure before the good part begins — if you arrive with the right habits already locked in. Twenty-seven airport travel tips from experienced flyers who stopped finding airports stressful and started moving through them the way it looks when the traveler beside you makes it seem effortless.
Grab Our Travel Packing Checklist
Our free packing checklist includes the airport essentials — the slip-ons, the liquids bag in the outer pocket, the offline boarding pass — so every item that makes security effortless and boarding smooth is in the bag before you ever reach the terminal. Start the airport experience at home, not at the bin.
Get the Free ChecklistThe travelers who move through airports like it is easy are not luckier than everyone else — they just prepared for the airport the same way they prepared for the trip.
The airport doesn’t have to be the part of the trip you just endure before the good part begins — if you arrive with the right habits already locked in.
Before You Arrive: The Airport Experience Starts at Home
Check in online the night before your flight — not the morning of
Online check-in opened at the twenty-four-hour mark and closed before it reached the departure morning for the traveler who was already in the middle of getting out the door. Check in online the evening before the flight, when the check-in window has been open for several hours, when the best available seats in the traveler’s class are still selectable, and when the boarding pass confirmation can be completed from a chair rather than from a moving vehicle or a check-in queue. The boarding pass confirmed the night before is the pass whose screenshot is taken that same evening, saved to the camera roll, and confirmed to open on airplane mode before the phone is put down. The morning-of check-in produces a boarding pass. The night-before check-in produces a boarding pass plus the time and calm to confirm everything is ready before the departure day begins.
Download the boarding pass offline immediately after check-in
The boarding pass in the airline app is the boarding pass that requires the app to load, the account to be accessible, and the network to be functional at the specific moment it is needed — which is the gate queue, the security line, and the jetway, all of which experience congested airport Wi-Fi and have the specific quality of being moments where loading delays are most conspicuous and least welcome. Screenshot the boarding pass from the app immediately after check-in is confirmed. Confirm the screenshot displays clearly by switching the phone to airplane mode and opening the image. Save one screenshot per passenger per leg in the camera roll. The boarding pass that loads in one second from the camera roll regardless of connectivity is the pass that makes every checkpoint a brief pause rather than a held queue. Take the screenshot the night before the flight. Use it at every checkpoint the next morning without a second thought.
Set a calendar alarm for the twenty-four-hour check-in window before every flight
Online check-in opens at precisely twenty-four hours before the flight’s scheduled departure time on most airlines, and the seat selection available at the opening of that window is the most complete available — the window seats, the exit row seats, and the aisle seats that fill progressively as other travelers check in across the twenty-four-hour period. A calendar reminder set for twenty-three hours and fifty minutes before the departure time fires ten minutes after the check-in window opens, when the full range of available seats is still selectable and the process can be completed before the best options are taken. The traveler who checks in at the window’s opening on the middle-seat-constrained flight is the traveler who secured the aisle seat before the middle-seat passengers filled in around it. The reminder costs ten seconds to set. The seat it produces is the one held for the entire flight.
Confirm terminal, gate, and any schedule changes the evening before departure
Gates change. Terminals change. Departure times shift by a few minutes in either direction as the flight operation is finalized. The traveler who checks the flight status the evening before departure arrives at the airport with confirmed current information rather than the information that was accurate at the time of booking. Most airline apps show current gate assignments the evening before and send push notifications for significant changes — enabling these notifications and reviewing the flight status once on the evening before ensures the departure morning begins with the correct terminal, the correct gate, and the correct time rather than the version from two months prior that the booking confirmation still reflects. The evening check takes thirty seconds. The confirmed gate it provides is the gate the taxi heads to and the terminal map search navigates toward before the airport is reached.
Arrive ninety minutes early for domestic flights and three hours for international ones
The suggested arrival times for domestic and international flights are guides built around typical airport throughput under normal conditions — and airports experience above-normal conditions with enough regularity that the traveler relying on the minimum arrives with margin only when everything cooperates. For domestic flights, ninety minutes provides enough time to handle a check-in queue, a security line longer than usual, a gate change requiring additional walking, and a brief sit to confirm the flight before boarding. For international flights, three hours addresses the additional layers that domestic departures do not require: passport control check-in verification, longer security queues, larger distances between check-in and gate at international terminals, and the pre-boarding document checks that some international destinations require. Build in the extra time before booking and before the taxi. The airport where everything went smoothly used it for coffee. The one where something went sideways used every minute.
Know the airport layout before you arrive rather than navigating it on arrival
Major airports publish detailed terminal maps, airside transit guides, and connection diagrams on their official websites and in their apps — available for review the evening before the departure or the night before a connection rather than at the moment of arrival when luggage is in hand and the departure time is counting down. Knowing where the security lanes are positioned relative to the check-in counters, which terminal the flight departs from, and — for connections — whether the connecting gate requires a train, a terminal change, or a full security re-entry, converts the unfamiliar airport from a navigation challenge into a known route. This is the preparation that makes the traveler who walks through a large hub with purposeful direction look experienced: they looked it up the night before and are following a plan, not making one under pressure in the middle of a terminal.
Let Us Build a Trip Where the Airport Is the Easiest Part
The airport experience starts with the right booking — the right connection time, the right terminal, the right pace. Tell us where you want to go and we will build the itinerary that sets every airport moment up for the smooth transit the trip deserves.
Plan Our EscapeThe Security Line: Move Through Like You Have Done This a Hundred Times
Wear slip-on shoes every single time you fly
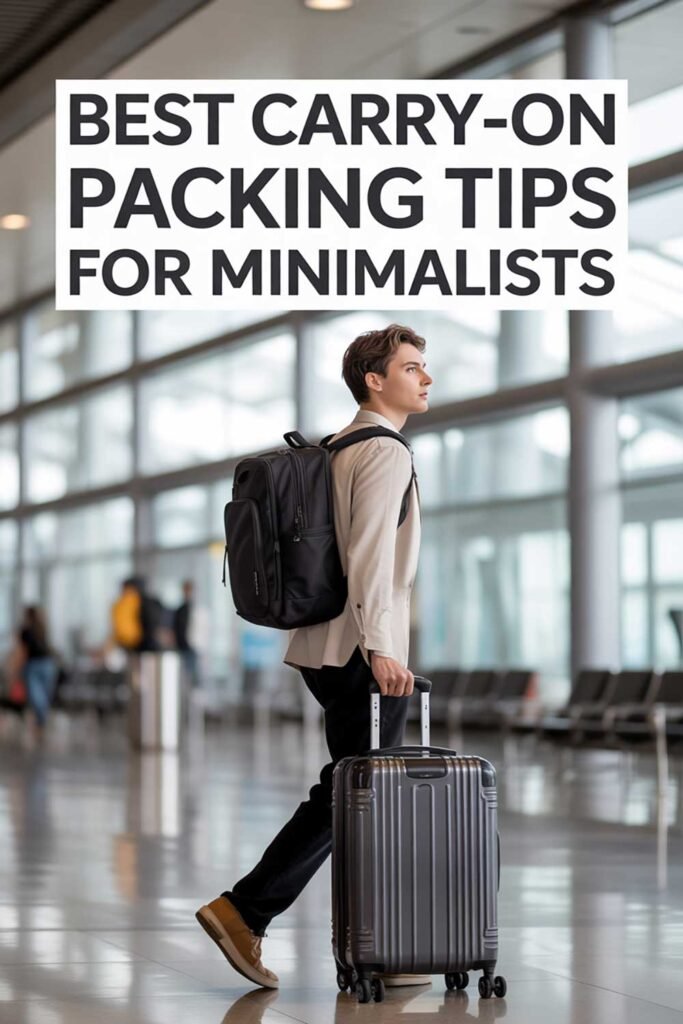
Shoes are removed at security checkpoints in the United States and at many international airports, and the traveler wearing lace-up boots who reaches the bin before the shoe is off and the traveler behind them who is waiting is the traveler whose experience of the security line is shared by everyone in it. Slip-on shoes — loafers, slip-on sneakers, mules, Chelsea boots — come off in three seconds and go back on in three seconds, without kneeling, without additional time at the belt, and without the specific awkwardness of managing a shoe with laces in a space designed for efficient throughput rather than individual dressing. Keep a comfortable pair of slip-ons as the designated travel shoe for every flight. Wear the shoes that are correct for the destination after the flight, not through the security checkpoint on the way to it. The slip-on is the airport shoe. Everything else is the destination shoe.
Remove your belt, watch, and all metal items from your body before joining the security queue
The belt removed at the security bin — buckle unfastened, belt pulled through the loops, folded and placed in the tray — is the thirty-second process that happens at the conveyor belt where the time cost is shared with everyone behind the traveler in the queue. The belt removed two minutes earlier at the back of the queue, tucked into the bag’s outer pocket alongside the watch and the keys, costs the same thirty seconds in a space that is designed for waiting rather than throughput. Do the metal removal at the queue’s entry point, not at the bin. The traveler who arrives at the conveyor with shoes in hand, bag opened to the outer pocket, laptop already accessible, and no metal on the body is the traveler whose security interaction takes twenty seconds rather than two minutes. That traveler is performing the same actions at a different point in the sequence — the one that moves the line.
Keep the liquids bag and laptop in the outermost carry-on pocket for effortless screening
The liquids bag buried in the main compartment behind the packing cubes is the liquids bag that requires the main compartment to be fully opened at the conveyor, every item in the top layer moved to reach it, and every item replaced before the bag is closed and sent through — a process that takes a minute and requires a bin, the conveyor, and the patience of everyone behind in the queue. The liquids bag in the outermost front pocket and the laptop in the outer pocket designated for it are items that come out in one motion each, go into the tray in two seconds, and go back into the same pocket when the tray returns. Set up the carry-on before the flight — liquids in the outermost accessible pocket, laptop in its own exterior slot — and leave this configuration in place for every airport transit the bag will experience. The carry-on organized for security is the carry-on that sails through it.
Have every pocket completely empty before you reach the screening bin
The pocket item discovered at the security bin — the phone still in the jacket pocket, the coins in the trouser pocket, the pen in the shirt pocket that triggers the secondary wand — is the pocket item that the queue behind it is waiting for while the secondary scan or the pocket contents search happens. Empty every pocket before joining the security queue: phone into the carry-on’s outer pocket, wallet into the bag, coins into the bag’s exterior zip, any other pocket item confirmed cleared. The traveler whose pockets are empty before the bin is the traveler who walks through the body scanner, collects the tray, puts the laptop back in its pocket and the shoes back on, and is moving toward the gate in under sixty seconds. Everything in the pocket is still there — it is just in the bag’s outer pocket instead of the jacket’s inner one, accessible immediately after the checkpoint and not an obstruction at it.
Consider TSA PreCheck or Global Entry if you fly more than three or four times a year
TSA PreCheck and Global Entry are the trusted traveler programs that convert the standard security lane’s shoes-off, laptop-out, liquids-separated process into a shoes-on, electronics-in-bag, liquids-in-bag process through a dedicated lane whose queue is consistently shorter than the standard one. TSA PreCheck covers domestic security checkpoints. Global Entry adds expedited re-entry from international destinations at U.S. Customs and Immigration, plus PreCheck access as a benefit. Both programs require a background check, an enrollment fee, and a brief in-person interview — a one-time process valid for five years. For the traveler who passes through airport security more than three or four times per year, the cumulative time saved across those trips and the consistent reduction in security-lane stress justify the enrollment cost before the first renewal is due. Apply once. Use it every domestic flight and every return from abroad for five years.
Gate to Gate: Move With a Plan, Not a Hope
Find your gate first, then find your food so you are never sprinting with a coffee
The airport meal purchased before locating the departure gate is the meal eaten under the specific awareness that the gate’s distance is unknown, the departure time is approaching, and the coffee cup will need to be managed at a pace that was not planned for. Find the gate first. Walk to it. Confirm the departure time displayed at the gate matches the boarding pass. Confirm the gate number matches the current information on the departures board rather than the booking confirmation. Then find the food, with the gate’s location, its distance, and its departure clock all confirmed, and the return walk planned in advance. The sprint with the coffee and the carry-on that the terminal café produced because the gate turned out to be twelve minutes away is the sprint that starts with finding the gate last. Gate first. Every time. The coffee is better when it is not a liability.
Note the gate number, departure time, and any recent changes the moment you clear security
The departures board at the security exit and the gate display at the confirmed gate are the two most current sources of flight status information available to the traveler between security and boarding. Check both immediately after clearing security — the board at the exit for the current gate assignment and the current departure time, and the gate display when the gate is reached to confirm the information matches. Gate changes happen at airports with specific frequency: delayed inbound aircraft, aircraft swaps, and operational reroutes all produce gate changes that appear on the board before they appear in the airline’s app. The traveler who reads the board at security exit and walks to the correct current gate is the traveler who makes the flight. The one who goes directly to the gate from the booking confirmation and discovers the gate has changed with fifteen minutes to boarding is the one whose airport experience contains the sprint that none of these tips exist to produce.
Charge devices at the gate while you wait rather than at home before you leave
The gate’s charging outlets — the floor outlets, the charging stations, the USB ports in the modern airport seating — are the power source available between security and boarding for every device that will be needed during the flight. Use them. A flight with a fully charged phone, a fully charged portable charger, and fully charged earbuds is a flight that never produces the specific anxiety of watching the battery percentage count down to the boarding pass threshold. The hour between clearing security and boarding is long enough to add a meaningful charge to any device. Keep the charging cable in the personal item’s exterior pocket — the same location it lives in for every flight, as established by the earlier tips — and plug in the moment a charging outlet becomes available at the gate. Land with everything fully charged by making use of the infrastructure that the airport provides specifically for this purpose.
Know the route to the connecting gate before the aircraft lands
The connection made without a sprint is almost always the connection made by the traveler who knew the route before the aircraft door opened. In flight, the connection’s gate information is available in the seatback screen on many aircraft and in the airline app — use it. In the final thirty minutes of the inbound flight, confirm the connecting gate, assess the distance based on the terminal map reviewed the night before, note whether the connection requires a transit train, a terminal change, or a passport control re-entry, and have a clear mental route from the arriving gate to the departing one before the seatbelt sign goes off. The traveler who stands in the aisle at arrival knowing exactly where to go and how long it takes is the traveler whose connection is made calmly. The one who confirms the connecting gate at the arriving gate’s display joins the navigation problem at the moment the time pressure is highest.
Stay within earshot of the gate during the boarding window — do not wander too far
The gate announcement — the early boarding call, the group number change, the final boarding call for the passenger whose name is being called at the desk — is the communication that the traveler in the terminal café two gates away is not hearing. In the thirty to forty-five minutes before the boarding window opens, stay close enough to the gate to hear the PA announcements and see the gate display’s status changes without needing to walk back. The boarding that begins earlier than the listed time because the aircraft is ready is the boarding whose final call the traveler at the distant restaurant does not hear. The meal that finishes with twenty minutes to spare at the café six gates away is the meal whose peaceful ending is replaced by the uncomfortable awareness that the gate is now actively boarding and the distance is known. Stay close. The terminal has enough radius to explore after boarding with time to spare.
How Owen Stopped Finding Airports Stressful and Started Moving Through Them Like They Were Easy
Owen traveled for work about eight times a year and had established a relationship with airports that he would characterize as tolerant rather than comfortable. He knew what he was doing — he had done it enough times — but there was a persistent low-grade friction to the airport experience that he had come to accept as the cost of flying: the security line that always took longer than he felt it should, the frantic quality of the ten minutes between the coffee he had bought and the gate he had not yet located, the middle seat he had ended up in on three consecutive flights because he had not checked in early enough to select anything else, the belt he pulled through its loops at the security bin while the family behind him watched with the specific patience of people who had plenty of it and were lending some to him.
The change started with the slip-on shoes. He owned a pair of casual loafers and had simply never thought to wear them flying, because flying was not an occasion that had a designated shoe choice in his habits. He wore them once on a work trip because the other options were in the bag and he noticed, at the security lane, that the removal and replacement took approximately six seconds, generated no queue impact, and required no floor contact or kneeling. He has worn slip-ons on every flight since — not because the lace-up boots had caused a crisis, but because the slip-ons removed a small, recurring friction that six seconds replaced with nothing at all.
The boarding pass screenshot followed when the airline app failed to load at the gate on a morning when the airport Wi-Fi was congested and the gate agent was actively boarding. The screenshot he had not taken was in an app that was loading. He boarded. It worked out. That evening he screenshotted both legs of the return flight before putting the phone down, opened them in airplane mode, confirmed both loaded, and has done this after every check-in since. The belt goes in the bag at the queue’s entry. The liquids bag moved to the outermost pocket of the carry-on six months ago and has not been anywhere else since. The gate is found first on every departure, always, before anything else at the airport happens. He charges at the gate because he noticed a floor outlet and used it once and arrived at his seat with a full phone and a full portable charger and spent the flight not thinking about either of them.
None of these were dramatic changes. Each one was a small habit that cost nothing and replaced a small friction with nothing. The accumulated effect of them across eight annual trips is the airport experience of someone who appears to find it easy — which he now genuinely does, because the preparation that makes it easy was done before the airport was reached. The twenty-seven tips in this article are every habit he built across those trips, written down before someone else has to learn them one friction at a time.
Boarding: Get On, Get Set, Get Ready for the Flight
Board when your group is called — not before, not significantly after
Early boarding — joining the queue before the assigned group is called — is the habit of the traveler who is anxious about overhead bin space and produces the crowded jetway that delays actual boarding while the groups ahead of the early boarder complete their process. Late boarding is the habit that produces no overhead bin space at all. Board when the specific group number is called: this is the moment the airline has calculated provides the seat, the overhead space assigned to the fare class, and the boarding sequence that loads the aircraft most efficiently. Group-appropriate boarding is not the dramatic convenience of first on or the last-minute drama of barely in time — it is the calm middle that produces a seat, the space above it, and the departure that proceeds without the specific contribution of one out-of-sequence passenger changing the boarding math for everyone after them.
Place your carry-on in the overhead bin correctly on the first attempt
The carry-on placed wheels-first in the overhead bin takes up more space than the carry-on placed handle-first, because the wheels are the bag’s widest point and positioning them outward occupies the bin’s depth inefficiently. Place the bag handle-side toward the aisle and wheels toward the bulkhead — the position that leaves the bag’s narrower profile occupying the bin’s limited depth and the maximum number of bags fitting in each section. If the bin above the seat is full, use the bin ahead of the seat rather than behind it — a bag behind the seat requires retrieving it against the deplaning flow, while a bag ahead requires a short walk forward that exits with everyone else. Check the bin before placing the bag to confirm there is actually space before attempting to fit a bag into a section where none exists. The first-attempt placement that works correctly is the one that does not produce the lift, rotate, and reposition that the boarding aisle waits through.
Have the boarding pass accessible and ready before the jetway line moves
The boarding pass retrieved in the jetway queue — phone unlocked, app loaded, boarding pass found and displayed — is the boarding pass produced under the specific pressure of the line moving ahead while the screen loads. The boarding pass ready before joining the jetway queue is the one that displays in one second from the camera roll, scans cleanly in the scanner’s lighting, and produces the gate agent confirmation before the queue behind has noticed the pause. Open the boarding pass before the jetway. Confirm it displays correctly. Hold it ready. The ten seconds of preparation in the gate seating area before the queue is joined is the preparation that makes the boarding moment a transition rather than a task. The camera roll screenshot is there for exactly this moment — fast, offline, always available, requiring no loading and no app cooperation.
Know what goes overhead and what goes under the seat before reaching the row
The boarding aisle is the wrong place to make the decision about which bag goes where. The carry-on goes overhead. The personal item goes under the seat in front of you. This decision should be made before boarding begins and maintained without variation. The personal item is packed for the flight — charger, snacks, neck pillow, sleep mask, document wallet, all the items needed between takeoff and landing — and needs to be accessible throughout the flight, which means under the seat rather than overhead. The carry-on is for the items not needed during the flight, which means overhead. The traveler who boards with this decision already made moves through the aisle without pausing to assess the options, places each bag in the right location, and is seated before the passenger behind them has reached the row number.
Keep the personal item accessible under the seat throughout the entire flight
The personal item’s value during a long flight is directly proportional to how accessible it is from the seat. A personal item pushed far under the seat, inaccessible without pulling it out completely, loses most of its function for the duration of the flight. Position the personal item under the seat so the top or exterior pocket is facing the aisle — accessible with a downward reach rather than a full extraction. This is particularly important on long flights where the charger, the snacks, the neck pillow, and the document wallet need to be reached multiple times without the full bag-retrieval process that a deeply positioned personal item requires. Set the position when seated, before the flight begins, so the first reach is already practiced and the items are where the hand expects them to be.
Set yourself up completely for the flight before the aircraft door closes
The five minutes between sitting down and the door closing is the preparation window for the entire flight — the last moment to extract items from the carry-on overhead before the seatbelt sign goes on, to position the personal item correctly, to have the neck pillow accessible, to confirm the boarding pass is in the camera roll for the connection, and to set any phone reminders for the flight’s movement breaks or the connecting gate check. Everything needed for the flight should be in hand, in the seat pocket, or in the accessible top layer of the personal item before the door closes. The flight from door-close to destination is the flight that is either set up before it begins or accessed reactively throughout it. The traveler who is fully set up when the door closes spends the flight in the experience. The one who is still arranging things at altitude spends the flight in the logistics of a preparation that was deferred past its ideal moment.
Our Curated Collection of Trusted Tools and Official Sources
Everything we use to plan, prepare, and travel with confidence — from official government travel tools to practical planning aids. We have pulled together the resources we trust most so every trip you take is better informed, better prepared, and a lot less stressful from start to finish.
DND ResourcesArrival and Baggage Claim: Finish the Flight Like You Started It
Know which direction baggage claim is before the plane lands
Baggage claim directions are available in the in-flight magazine, on the seatback screen at many airports, in the airport’s app, and from a thirty-second review of the terminal map the night before the departure. The direction confirmed before the aircraft door opens is the direction the deplaning traveler walks without pausing to read the signs — the head start over the passenger beside them who is still orienting to the terminal’s direction at the moment the walk that determines baggage claim queue position begins. For travelers with no checked baggage, this is the direction to ground transport, and the same principle applies: the traveler who knows where the exit is before landing is already moving when others are reading signs. Know the layout. Walk the plan. The airport that feels effortless is almost always the airport whose layout was familiar before arrival.
Check your baggage claim tag number before leaving the aircraft
The baggage claim tag — the small receipt attached to the boarding pass at check-in, printed on the back of the boarding pass, or viewable in the airline app — contains the specific identifier that connects the passenger to the checked bag on the airline’s system. In the event of a missing bag, this number is the first information the airline’s baggage desk requires to locate the item in the system and begin the recovery process. Before leaving the aircraft, confirm the tag number is accessible — either in the app, on the boarding pass, or in the document wallet. At baggage claim, confirm the carousel number on the display for the flight, position at the carousel with clear sight of the arriving bags, and know the tag number well enough to cross-reference if a bag’s visual identification is ambiguous. The tag takes ten seconds to locate before deplaning. The lost luggage process without it takes significantly longer.
Move away from the baggage carousel opening immediately after claiming the bag
The baggage carousel’s throat — the opening from which bags emerge — is the point of maximum congestion at every arrival, because the passengers who have not yet identified their bags stand as close to the opening as possible in order to see bags earliest, which positions them between the carousel and the passage space that allows other passengers to see, reach, and retrieve their bags. Once a bag is claimed, move immediately to the open space beyond the carousel’s perimeter, out of the line of sight of the carousel’s throat and into the space that allows the remaining passengers the access that was just obstructed. It is a thirty-second transition that costs nothing and returns something to every other passenger still waiting. It is also the position from which ground transport, customs, and the exit are navigated more efficiently than from the carousel’s congested immediate area.
Have the ground transport plan confirmed before the aircraft lands
The ground transport decision — taxi, rideshare, airport bus, hotel shuttle, rental car — that is made in the arrivals hall after a long international flight produces the choices at the moment the traveler is most fatigued and least equipped to compare options clearly. The same decision made before the flight — the rideshare app with the destination address already queued, the taxi stand’s location confirmed on the terminal map, the hotel shuttle’s pickup point known from the accommodation’s check-in email — produces an arrival that transitions directly from customs exit to transport without the overhead of an in-airport research session conducted with luggage in hand. Know the ground transport plan before landing. Have the address in the app, the shuttle point on the map, or the taxi queue’s location confirmed. The first minutes out of the arrivals hall are the minutes that set the tone for everything that follows. Begin them moving, not deciding.
Always do a complete seat, pocket, and overhead check before you deplane
The item left on the aircraft is the item most difficult to recover — found by the cleaning crew after the aircraft has turned around for its next leg, logged with the airline’s lost property system, retrieved days later if the system works efficiently and the item is correctly identified. A thirty-second check before standing to deplane eliminates the airport’s lost property process for every item it finds: the phone left in the seat pocket, the earbuds dropped between the seat and the armrest, the jacket in the overhead bin above the seat, the passport slid to the back of the seat pocket during the document check. Check the seat pocket, both armrests, the floor beneath the seat, the overhead bin, and any surface where an item was placed during the flight. The check takes thirty seconds. Do it every time. The item that would have been left behind is the item that comes home instead.
Book the Trip That Makes Every Airport Day Worth the Habits
The airport experience at its best is the smooth, unhurried transit between home and somewhere genuinely worth going. Our travel agents plan the destinations that make every check-in, every gate, and every baggage carousel feel like the beginning of something rather than the obstacle before it.
Book A TripThe boarding pass was in the camera roll before the taxi was booked. The slip-ons came off in three seconds. The liquids bag was in the outer pocket. The gate was found first. The coffee came after. The connecting gate was known before the wheels touched down. The seat check took thirty seconds and found the earbuds. That is twenty-seven tips. That is moving through airports like it was always this easy.
Picture the Airport That Finally Feels Easy
The check-in happened last night and the seat choice was the aisle, because the window had already been taken by the time anyone else was checking in. The boarding pass screenshot is in the camera roll and opened in airplane mode before the phone was put down. The slip-ons are on. The belt and watch are in the outer pocket of the carry-on alongside the liquids bag. The laptop is in the designated outer slot. The pockets are empty. Security takes forty-five seconds. The gate is found before the coffee is bought and the coffee is finished with eighteen minutes to spare at a seat thirty feet from the jetway. The departure board confirmed the gate number has not changed. The device is charged from the floor outlet beside gate twelve. The connecting gate is already confirmed from the seatback screen, two terminals over, no security re-entry required. Bags are placed correctly on the first attempt. The personal item is positioned for access and the neck pillow is already out. The seat check before deplaning finds the phone charger in the seat pocket. The baggage carousel tag number is in the app. The rideshare is queued before the customs exit doors open. That is twenty-seven tips. That is the airport experience of someone who prepared for it the same way they prepared for the trip.
One More Thing Before the Next Flight
Print our free Travel Packing Checklist and confirm the slip-ons are packed, the liquids bag is in the outer pocket, the laptop has a designated outer slot, the belt is packed rather than worn, and every item that makes security effortless is in the right place before the airport is ever reached. The same checklist we use before every flight we take.
Get the Free ChecklistExplore Our Top Picks for a Better Trip
After years of exploring the globe together, these are the exact tools, platforms, and services we rely on for every single trip — personally tested, traveler approved, all in one place. We don’t recommend anything we wouldn’t use ourselves, and this is the collection of booking platforms and travel tools that have made our adventures smoother, smarter, and more memorable.
See Our Top PicksLove Helping Travelers Have the Airport Experience They Deserve?
Helping a traveler move through airports smoothly — the right booking, the right connection time, the right preparation — is part of what makes a home-based travel agent genuinely valuable to their clients. If turning your love of travel into a business sounds like the right next journey, see how the TravelPreneur system works.
Become An AgentTravel Day Printables at Premier Print Works
Visit Premier Print Works for flight-day checklists, travel planners, packing guides, and printables that make every departure more organized and every airport more manageable — from the boarding pass screenshot taken the night before to the seat check completed before the aircraft door opens.
Visit Premier Print WorksDisclaimer
The information shared in this article is provided by Don and Diana’s Travels for general informational, educational, and inspirational purposes only. It reflects our personal experiences, opinions, and the experiences of travelers we have worked with. It is not professional travel, legal, or financial advice.
Airline, Airport, and Security Policies
Airport security procedures, TSA and international screening requirements, online check-in policies, baggage policies, boarding procedures, and all related airline and airport practices vary by carrier, airport, and country and are subject to change without notice. Always confirm current requirements with your specific airline and the relevant security authorities before traveling. We are not responsible for any outcome arising from reliance on information in this article.
TSA PreCheck and Global Entry
TSA PreCheck and Global Entry program details, fees, eligibility requirements, and enrollment processes are subject to change. Always confirm current program requirements and fees directly from official U.S. government sources before applying.
Affiliate and Partner Links
This article may contain affiliate and partner links that pay us a commission at no extra cost to you. Our recommendations are based on real use and genuine belief in the products and services we share.
Composite Stories
Stories on this site combine real experiences from Don, Diana, clients, and travelers we have worked with. Details may be adjusted for privacy and narrative clarity.
No Guarantees
We do not guarantee any specific airport or travel experience from using the information in this article. Travel involves inherent uncertainty and personal responsibility.
Copyright and Use
All content is the copyrighted property of Don and Diana’s Travels. You may not copy or republish our content without prior written permission. You are welcome to share a direct link with proper credit.
By reading this article, you acknowledge that you have read and agree to this disclaimer.